
Opening the Designer
As a simple example of a full user-defined data entry screen, this section will explain how to create a suitable user interface for the SLA object already explained in the preceding sections. For this purpose, first select the SLA_Data object in Docusnap Management in Manage Objects. Click the Data Entry Screen button to open the empty data entry screen. Once the Designer is open the data entry screen can be crated.
Designing the User Interface
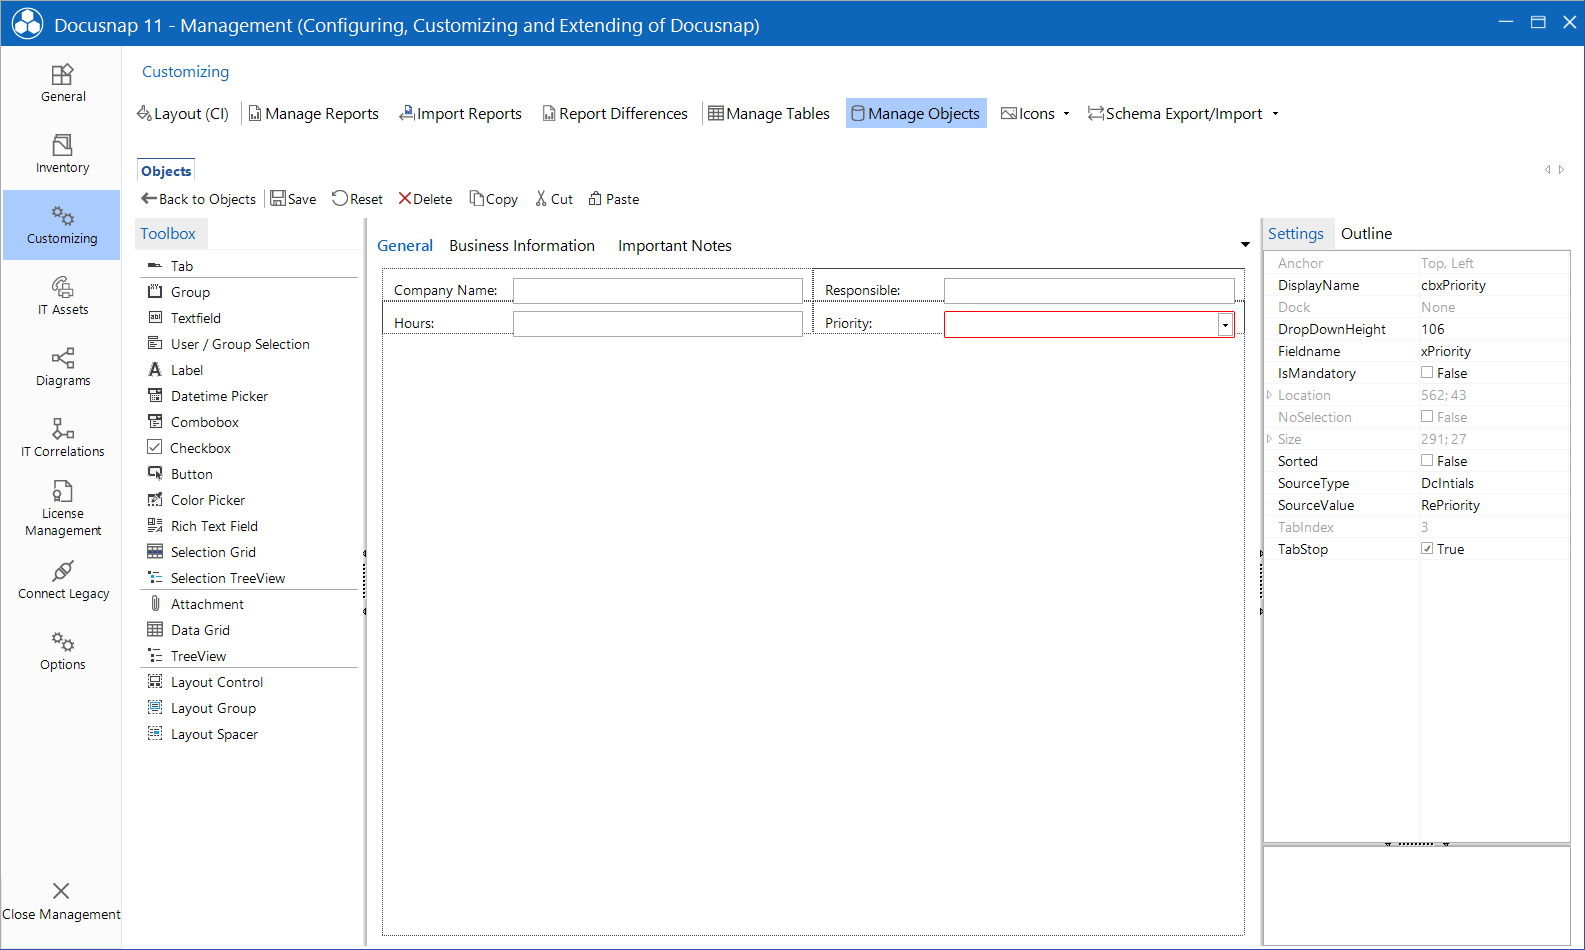
In order to be able to enter all data that is required to create a total of five controls are necessary which will be briefly introduced in the table below, including their properties. The Control column indicates the type; the Field Name column the value of the Fieldname property; and the Notes column shows other required settings.
Control |
Field Name |
Characteristics |
Layout Control |
Ā |
Dock: Fill |
Text Box |
xName |
TabIndex: 1; IsMandatory: True |
Text Box |
xResponsible |
TabIndex: 2 |
Text Box |
xHours |
TabIndex: 3, TextConstraint: Decimal |
Combo Box |
xPriority |
TabIndex: 4; SourceType: DcInitials; SourceValue: RePriority |
In the first step add a Layout Control. By setting the property Dock to Fill the control spreads to the whole surface. Subsequently, add three text boxes and a combo box. Then the user interface should appear as shown in the figure below and have all required features. All four data entry controls need to be connected to the corresponding columns in the Docusnap database by specifying the column name the Fieldname property. The combo box will be filled with a predefined list of different selectable priority settings, because you assigned the REPRIORITY reference value.
If you added and configured all controls properly on the Properties tab, you can save the new data entry screen by clicking the Save button in the toolbox. Depending upon the active configuration, the data entry screen will be stored in the folder for local or team settings. If you want that other users have access to the new data entry screen too, you need to distribute the corresponding file to these users. For more information on this topic, refer to the Distributing Customizations section below.
Testing the Newly Created Data Entry Screen
To test if the newly created data entry screen works properly, close Docusnap Management. Now, it is possible to create a new SLA object by selecting the SLA caption and clicking the New button above the Inventory tree view. The newly created data entry screen will appear in the main window of Docusnap and users can enter and edit data as required. By clicking the Save button above the Inventory tree view, the data is saved directly in the current or new record of the user-defined Docusnap table.
|
Please note that errors that occur during this test are not necessarily caused by errors in the data entry screen. Due to the fact that this SLA example consists of three components, errors may arise from any one of the components and might only now become visible. For example, if data input controls are shown in read-only mode, it is very likely that Docusnap was not able to establish the connection to the database column. In most cases, this error is due to incorrect or missing settings for the Fieldname property of the respective controls. |

