The Concepts ribbon displays when you have selected Concepts in the Documentation tree. Using this ribbon, you can edit and change concepts.
Concept
- Edit: A click on the Edit button launches the Concept Editor where you can edit the selected concept.
- Refresh: Use the Refresh button to update the concept. This reloads the data for data elements, reports, etc. and recreates the table of contents.
- Export Concept: Using the Export Concept button, you can export your concept to Word, PDF, or other formats.
- Properties: Click on the Properties button to open the Concept Properties Dialog. In this dialog the name of the concept and the author can be changed. In addition, the date of change and creation as well as the size are displayed. A description of the concept can also be added.
- Clone Concept: Click on the button Clone Concept to copy the selected concept. The name can then be changed in the Concept Properties dialog.
- Print: By clicking the Print button, you can print the selected concept.
Versions/Backup
- Restore: Clicking the Restore button restores the selected version or the selected backup as a concept and can be edited. The previous concept remains as the last backup.
- Keep: Since only a certain number of versions and backups of a document can be stored, you can click this button to select and keep a certain version or backup. This prevents the current document version from deletion.
Composition
A composition is a document created from multiple concepts. If the concepts of the composition are changed, the composition document also changes. The export of compositions can be planned in a time-controlled manner like the export of the concepts.
- Add: If the node Concepts or a concept folder in the tree has been selected, the button Add can be used to open the Manage IT Concept Composition dialog.
- Edit: If a composition has been selected, the dialog to edit a composition can be opened via the Edit button.
Other

- Templates: Clicking the Templates button opens the Concept Templates dialog.
- Assign: Clicking this button opens the Assign Concept dialog which allows you to insert the desired concept into other tree views. It is also possible to add a concept folder to a node in one of the other trees.
- Schedule as Job: Clicking this button opens a wizard which allows you to schedule creation of a concept for a certain date and time.
- Store Concepts / Load Concepts: Concepts, versions, backups and templates can be saved as a file. These can then be imported into other companies or other databases.
- Migrate Concept: The concepts that are in the defined concept path are automatically moved to the database. If other IT concepts are saved in a different folder, they can be stored in the database via the Migrate IT Concepts dialog.
Text Editor
General
- Save: After clicking the Save button, you can decide whether to simply save the concept, to save it as a new version, or to save it as a template.
- Refresh: Use the Refresh button to update the concept. You can specify whether you would like to refresh the entire concept or just the document outline. A refresh of the entire document reloads the data for data elements, reports, etc. and recreates the table of contents. When you just refresh the document outline, the system recreates the table of contents and reloads the entries in the navigation pane.
- Export: Using the Export button, you can export your concept to Word, PDF, or other formats.
- Print: By clicking the Print button, you can print the open concept.
- Draft View: By enabling the draft view elements such as reports, plans, relationships, etc. are not completely displayed, only a placeholder is shown at the location at which they were inserted. Thereby the concept has not as many pages and is easier to process.
Edit
- Paste: Using the Paste button, you can insert elements from the clipboard into the text area.
- Cut: This button allows you to cut selected text elements.
- Copy: This button allows you to copy selected text elements to the clipboard.
- Hierarchical structure: By clicking the arrows, you can change the hierarchical level and order of the headings in your concept.
- Find: The
 button allows you to find particular parts in the entire text quickly and easily.
 - Replace: The
 button allows you to find and replace certain text parts.
Formatting
This group contains buttons that can be used to change the font, color, and typeface of your text.
Paragraph
The buttons in the Paragraph group allow you to adjust the alignment and formatting of the paragraphs in your text area.
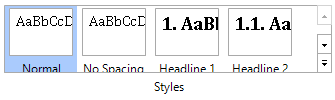
Styles
For text formatting, Styles are available which allow you to edit the text in your entire document in a centralized way. These styles are also needed when creating the table of contents.
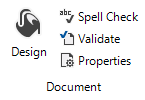
Document
- Design: Clicking the Design button opens the Designs and Styles dialog. This dialog allows you to individually define the design of your concept.
- Spell Check: Click the Spell Check button to start the integrated spell checker.
- Validate: By clicking the Validate button, you can check the concept for validity. Any errors found will be displayed in the error list. An error is present if, e.g., an inserted diagram was deleted or if a report does not exist any longer.
- Properties: Click the Properties button to open a window which lists the properties of your concept. Here, the title and author of the concepts may be changed. You can also enter an additional description. The properties also include additional information such as the date when the concept was last modified.
Insert
Use the Insert ribbon to insert different elements into your concept.
- Header and Footer: Use the Header or Footer button to open an additional tab where you can specify your header and footer settings.

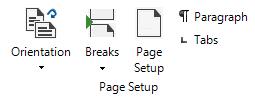
Page Layout
- Orientation: The options below this button can be used to specify portrait or landscape format.
- Breaks: Click the Breaks button to insert a page break. Two different types of page breaks, i.e. Continuous and Next Page can be selected.
- Page Setup: Click the Page Setup button to adjust the margins, paper size, header and footer, columns, and borders of your document.
- Paragraph: This button opens a dialog that allows you to change the formatting, indents, frame, and page breaks of your document.
- Tabs: This button opens the Tabs dialog where you can set and change various indents.
Data Elements
If you highlight a certain element such as a map, a diagram, or a data element, an additional ribbon displays.
- Settings: When you click the Settings button, you can specify further settings for the selected element.
- Refresh: For elements such as data elements, maps, or diagrams, you can click the Refresh button to load their current version.
- Delete: Click the Delete button to delete the selected element.
- Draft View: By enabling the draft view the selected element is not completely displayed, only a placeholder is shown at the location at which it was inserted.
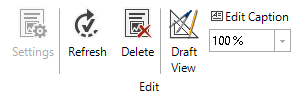
Table Tools

The Table Tools ribbon display when you insert a new table or select an existing table.
Table Styles
Various styles are available for tables. Click the little arrows next to the buttons and select the desired basic shading for your table.

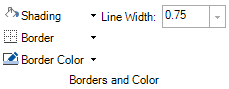
Borders and Color
In the Borders and Color group, you can select the shading, border color, border, and line width for the selected part of the table.
Table
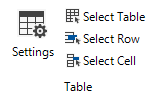
- Settings: Here, you can change table properties such as the distance from text or the cell height.
- Select Table: Click the Select Table button to select the entire table.
- Select Row; Select Cell: These two buttons can be used to select the row or cell where the cursor is currently placed.
Rows and Columns
- Delete Table; Delete Columns; Delete Rows: These options can be used to delete the entire table, selected columns, or selected rows. These options display when you click the Delete button.
- Insert Above; Insert Below; Insert to the Left; Insert to the Right: These four buttons can be used to insert more columns and lines into an existing table.

Merge
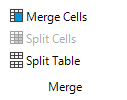
- Merge Cells: Click this button to merge the selected cells into one.
- Split Cells: Clicking this button allows you to split the highlighted merged cell again.
- Split Table: Click this button to split the existing table into two.
Header and Footer
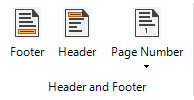
This ribbon allows you to create headers and footers.
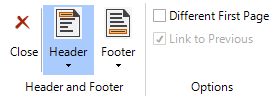
Header and Footer
- Close: Click this button to end the editing of your headers and footers. You are taken back to the General ribbon.
- Header; Footer: Use these buttons to enable, disable and modify your headers and footers.
- Different First Page: Tick this checkbox to create a special header and footer for the first page of your document.
- Link to Previous: If you enable the Link to Previous feature, a document with multiple sections will always use the header and / or footer of the previous section.
Position
In the Position group, you can change the position of your headers and / or footers.