
Create Package
The creation of a Docusnap Connect package is done in the ribbon Extras - Package Editor dialog. The package is created there and the content to be exported is defined.
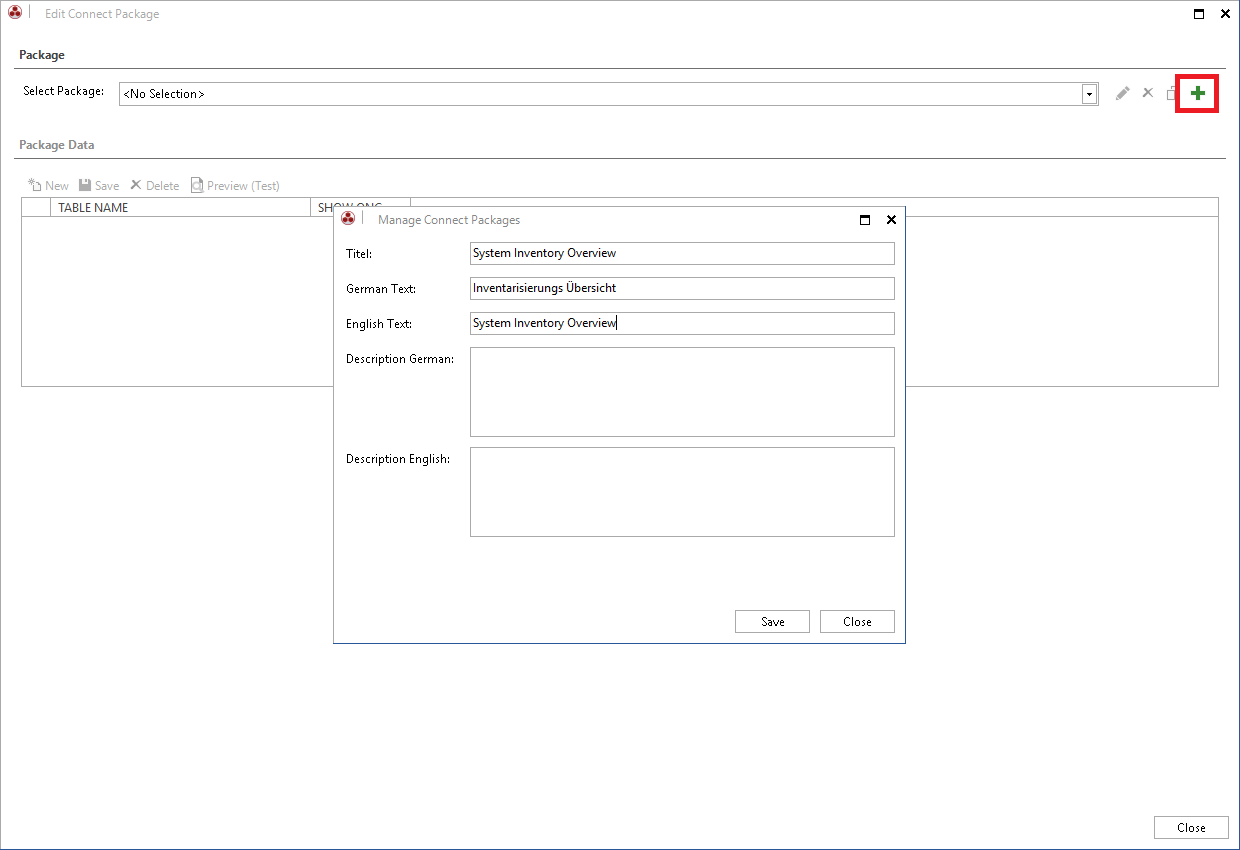
In the Edit Connect Package dialog new packages can be created, existing packages can be edited / duplicated or deleted.
Create New Package
Click on the button  to create a new Docusnap Connect package. The title, text German and text English are then filled in and the data saved.
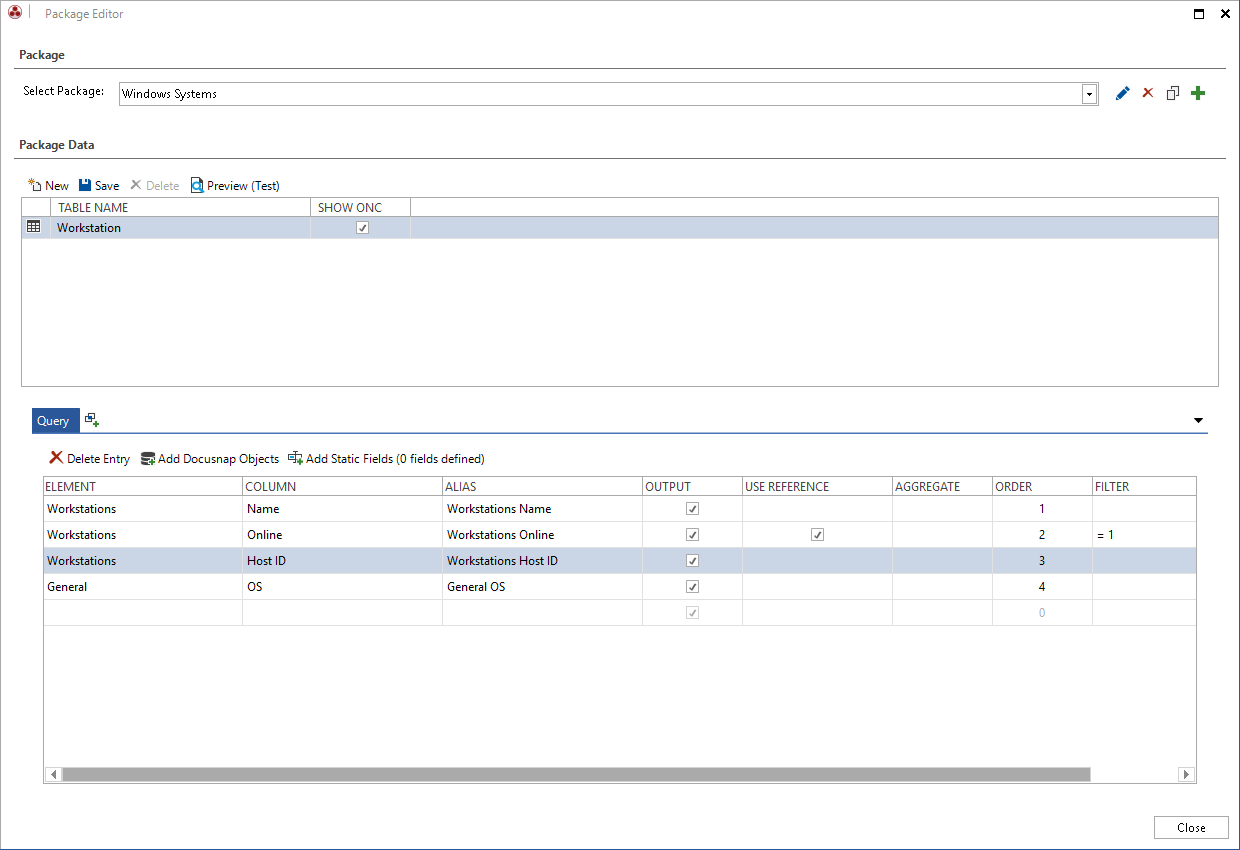
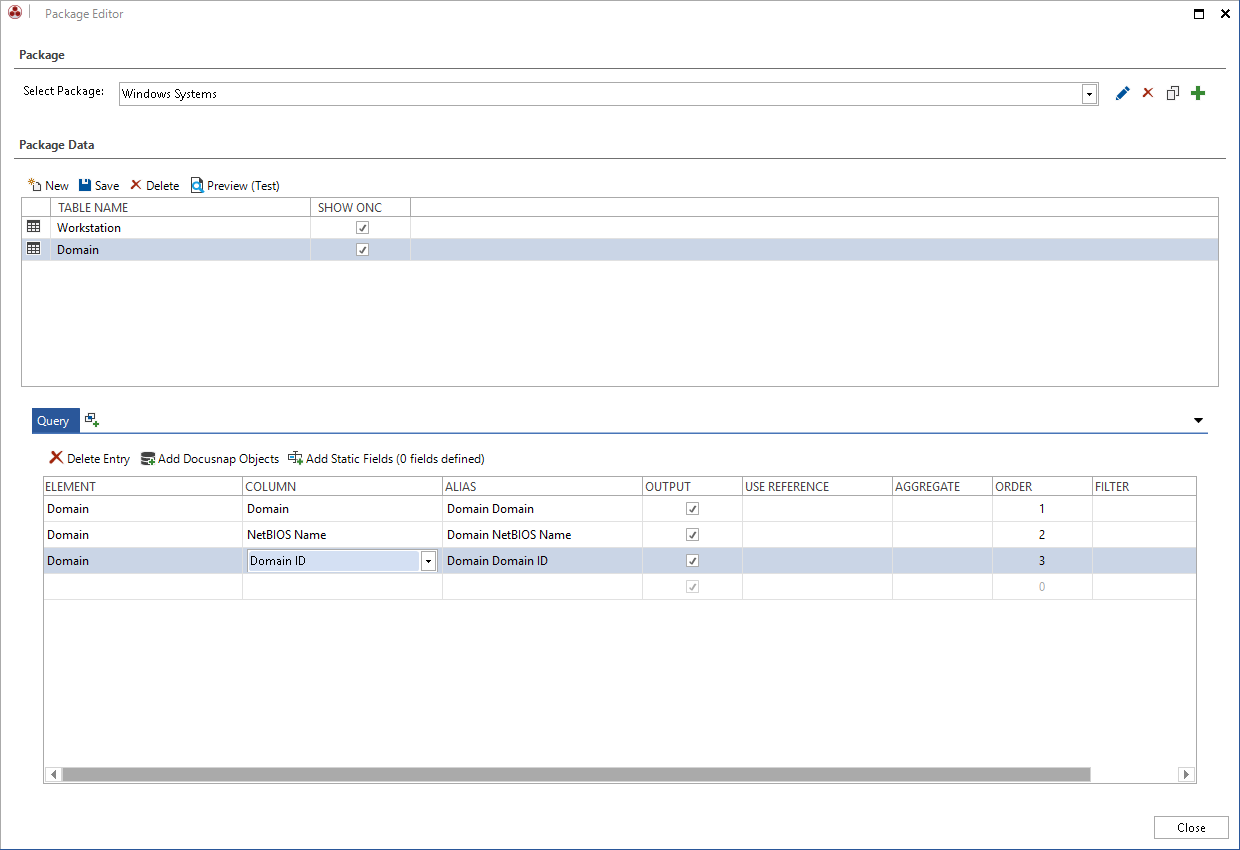
In the Table Name list all already defined tables are displayed. When you first open a package an empty table is already created. Enter the name to be assigned to the table after the export in the Table Name field.
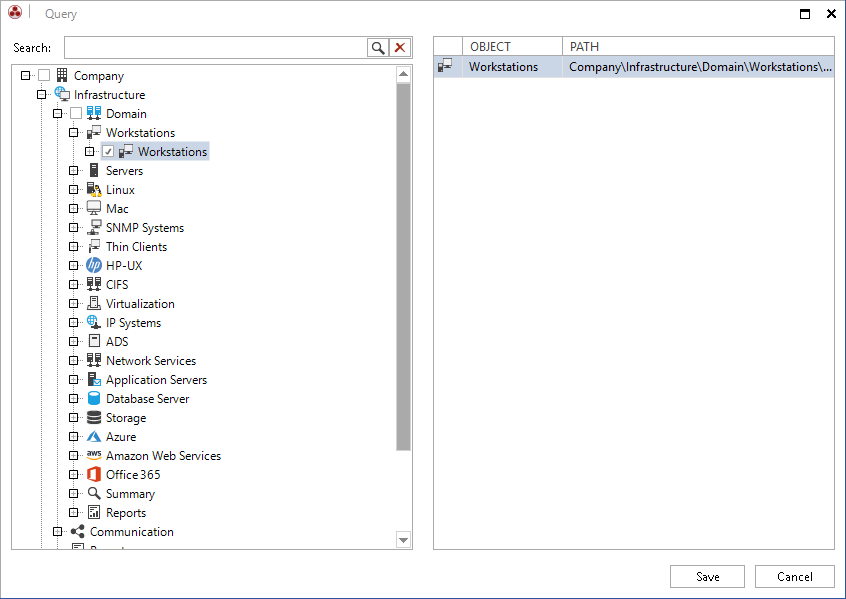
Docusnap Object
By clicking on the button Add Docusnap Objects, all entries from the Explorer Inventory are displayed. Tick the checkbox to the left of each object that you want to select for export. By clicking the Save button, the dialog is closed and the columns of the selected objects can be used.
|
If data of an inventory is selected, only the current data of the last inventory is exported. |

- Element: In the Element combobox, select the object whose data you want to export.
- Column: By double-clicking a field in the Column list, you can display the columns of the selected object. Select the desired column there. If you no longer need a column, you can remove it by selecting the line and either click the Delete button or press the Del key on your keyboard.
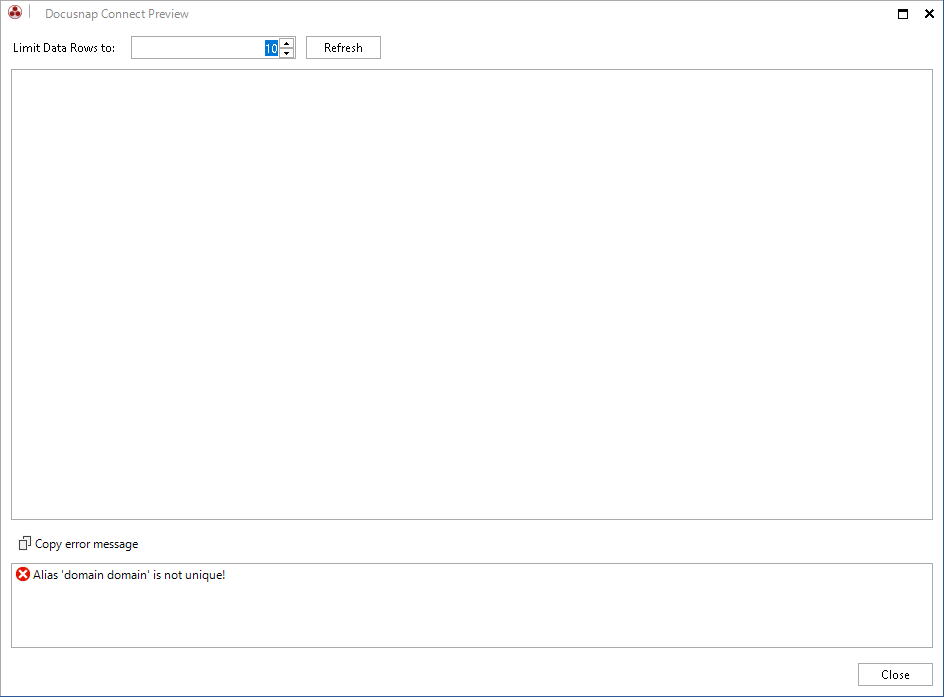
- Alias: In the Alias column, you can specify the name of the column in the exported table. Each name in the Alias column must be unique.
- Display: If you enable the Display checkbox, the column will be displayed in the exported table. By disabling it, you can hide fields that are only used for data filtering.
- Reference: For columns with a reference specified, the reference can be added to the export. If you enable the Reference checkbox, the number in the column will be replaced with the corresponding reference text. When exporting, you can select the language in which you want the reference to appear.
- Sort Order: Using the Sort Order column, you can define the column order.
- Grouping: Here, you can select whether the respective column will be used for grouping or whether to calculate the count, maximum, minimum, sum, or average of the column.
- Filter: Here, you can enter any valid SQL condition (e.g. = 1). To hide the column used for filtering, you can disable the Display checkbox for this column.
The clause can further be extended by additional fields or conditions. The filter can only address another column by using the alias. This must be specified with {Alias:Aliasname of column}.
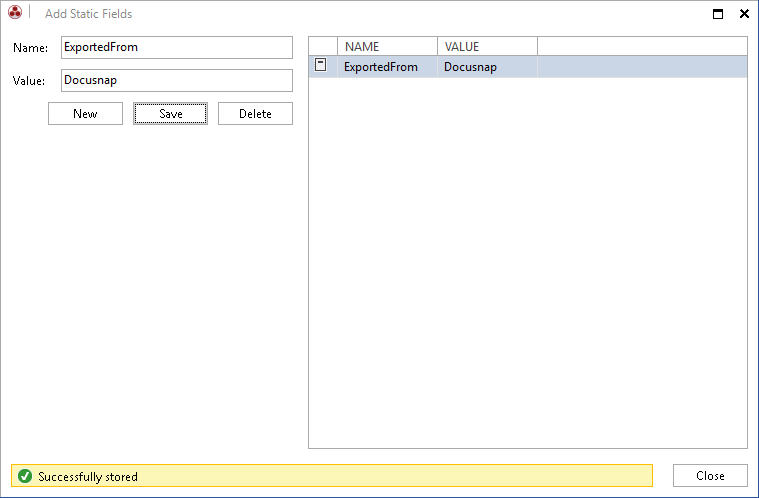
Static Fields
Static values can be exported, in addition to the values from the table. Click on the button Add Static Fields to open the dialog for the static fields. The specified name is used as the column header and the value is specified in the table. As soon as a static value is created, it is included in the export. Values that are no longer required can be removed by clicking on the Delete button.
Multiple Tables
To export multiple tables, click the New button to add more tables for which the data can be configured. If you want to be able to link the data from the different tables after exporting to a database, the primary and foreign keys should also be selected.
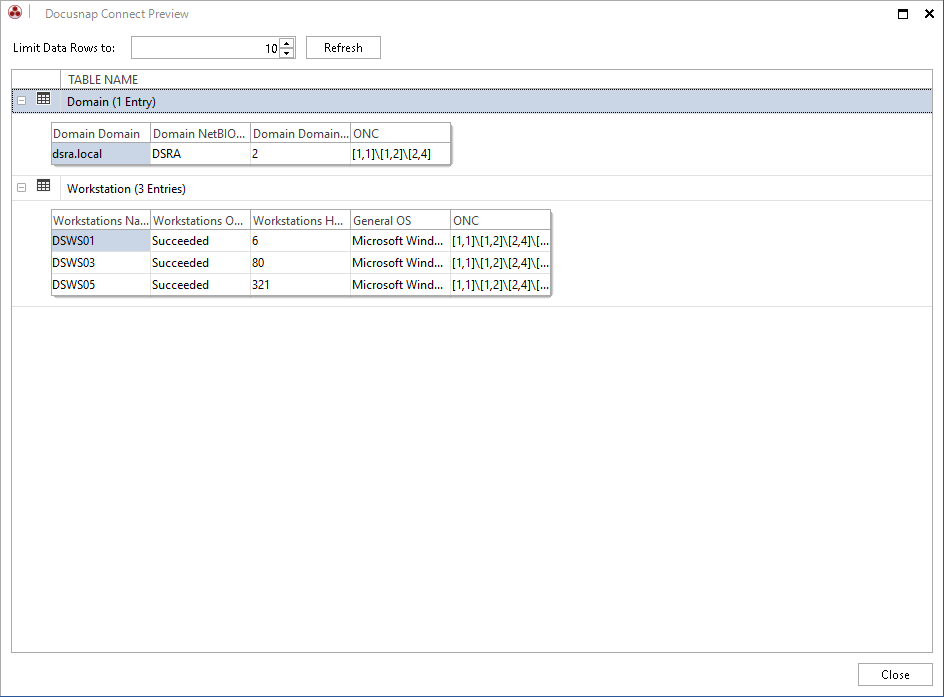
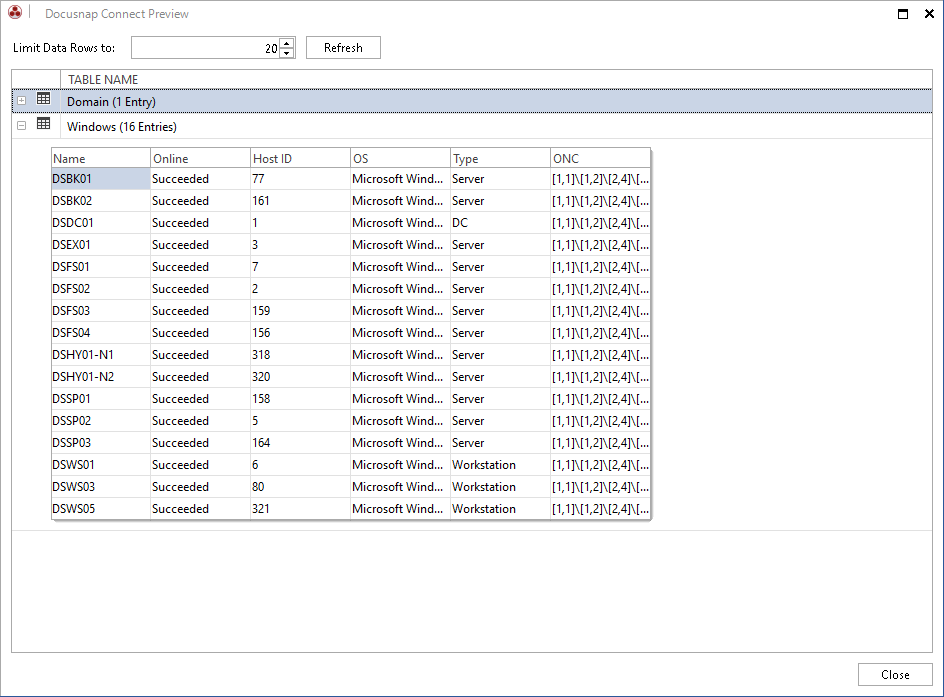
Preview (Test)
Once you have selected the tables and columns, you can click the Preview (Test) button to check the table output. By default, the first ten data rows of the table are shown in the preview. You can change this value in the Limit Data Rows to: field.
For the export, an additional column named ONC will be added to the data. This column identifies each object unambiguously so that, during an update of the SQL database, the objects can be mapped without problems. This column is also used for DocusnapLink when switching from another application to this Docusnap node.
If an error occurs during the export test, it will be displayed as an error message in the lower area.
Union
At the bottom, clicking on the  button creates a union. The Union works like a union in SQL. The data from various objects is combined in one table. If the same Alias name is given for columns in the different definitions, the data is output in one column. If there is no matching Alias name in the other definition for one column, that column will be left empty for the entries in the other table.
For example, the union can be used to show the systems from the Workstations node and the Servers node in one table.
Definition for workstations
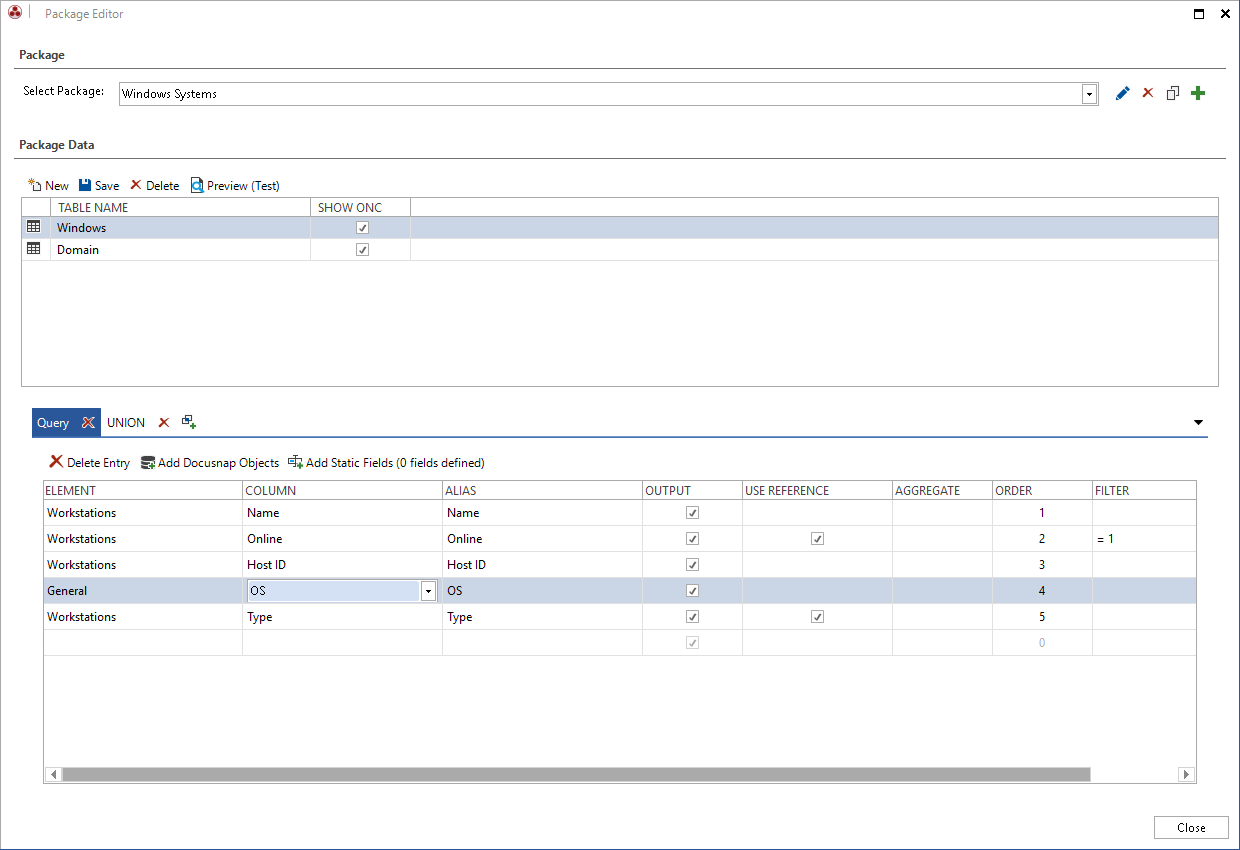
Definition for servers
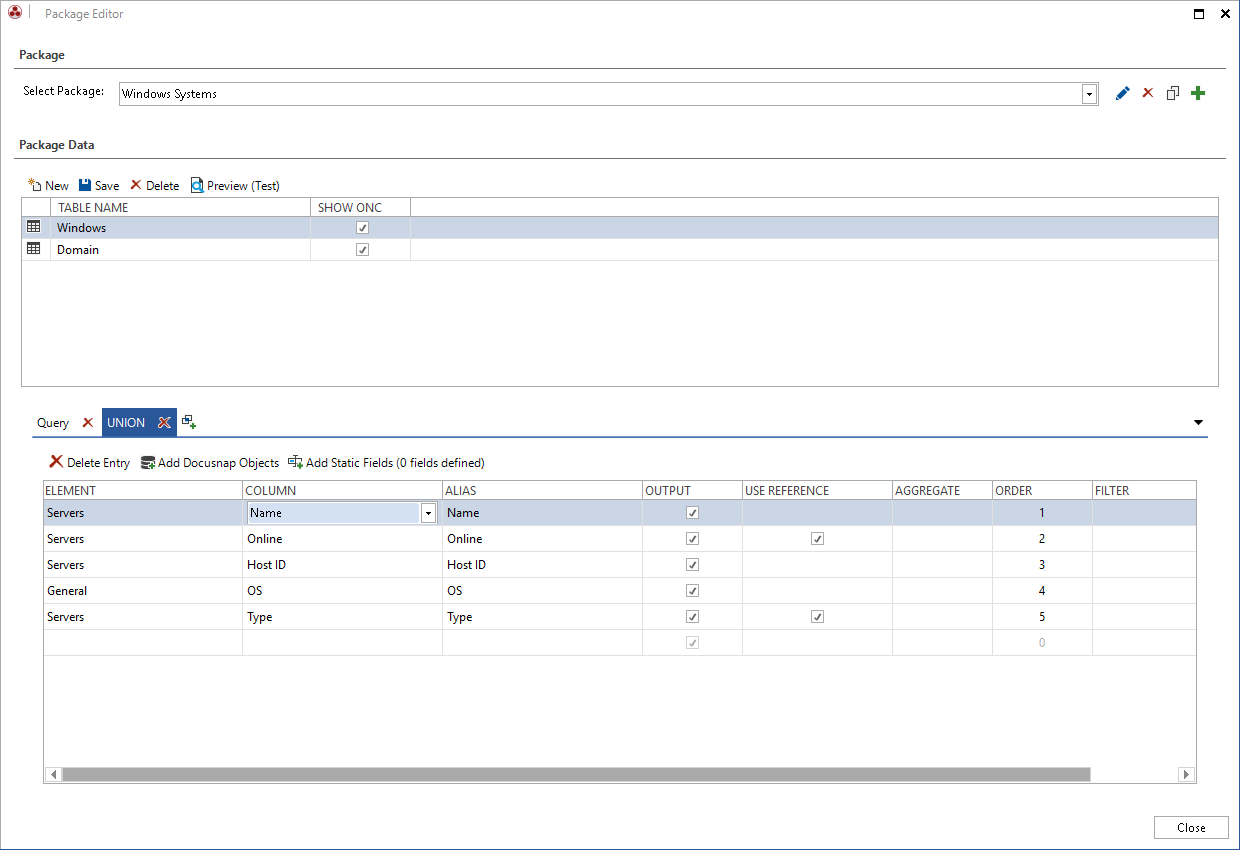
In this example, a union was added for the node server. The same names have been assigned for the columns. This will then output the data of the two definitions like in the preview.
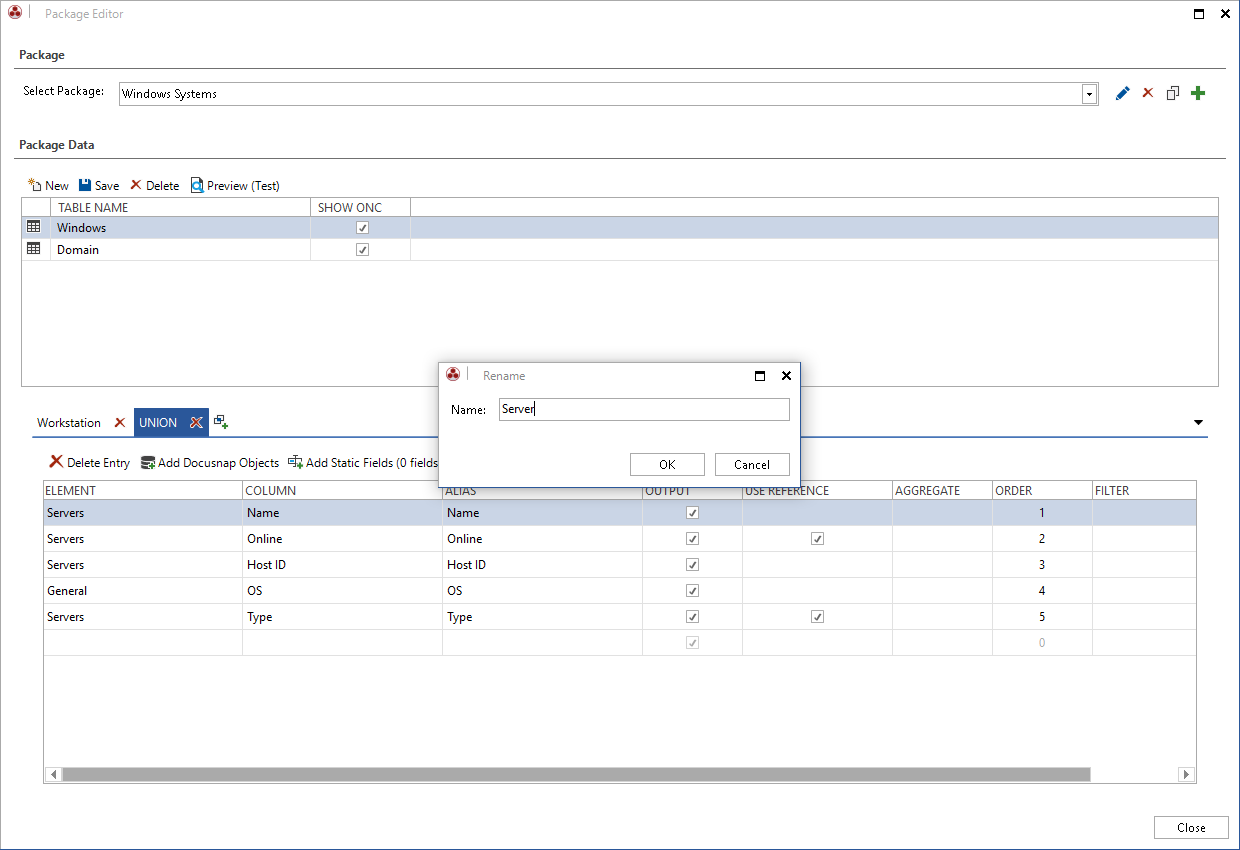
By double-clicking on  or
or  , a different name can be specified. Especially when multiple unions are used, naming the definitions makes it easier to select the right one.
Customized Objects
Customized objects and tables can be exported with Docusnap Connect. If a user table has been created for which a primary key and a foreign key have been defined, this object can be exported. If this is a user-defined view from which the data is to be exported, a number of points must be observed.
The SQL statement of the view is changed during the export in order to be used for the Connect. For this reason, the column used for filtering with {FilterID} must be included in the Select part of the view. This value is then matched against the primary key of the parent object. The column must have the same name as the primary key of the parent table or view for the match to take place. For example, if a view was created with customized tables in which the column is called xAccountID and not AccountID, but this view is located below the Docusnap table tAccounts in which the primary key is called AccountID, the view in the Select part the xAccountID would have to be renamed with as AccountID.
In order to reload changes to the metaschema, you must exit the administration area and then reopen the administration area. The changes are then available for the Connect package.
