
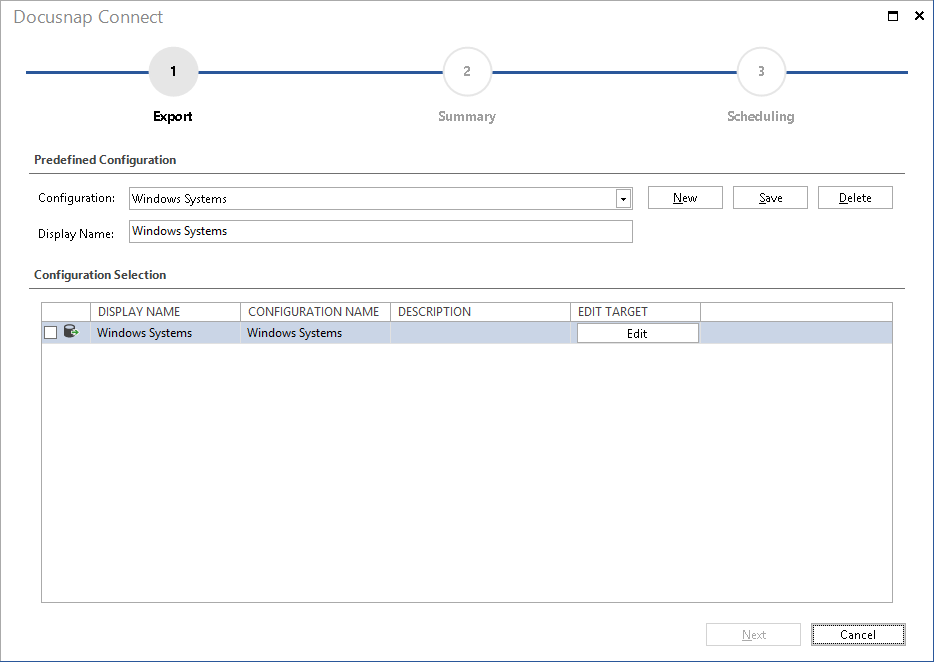
Once you configured the packages in Docusnap Management, you can export the corresponding data.
Click the Schedule Connect Package button in the Extras ribbon to launch the Docusnap Connect wizard. In the first step, select the package to be exported. To do so, click the New button. Then, save your selection and configure the target.
You can select as many packages for export as desired. In addition, it is possible to export them to different targets.
To open the target configuration dialog, click the Edit button.
Configuring Docusnap Connect Targets
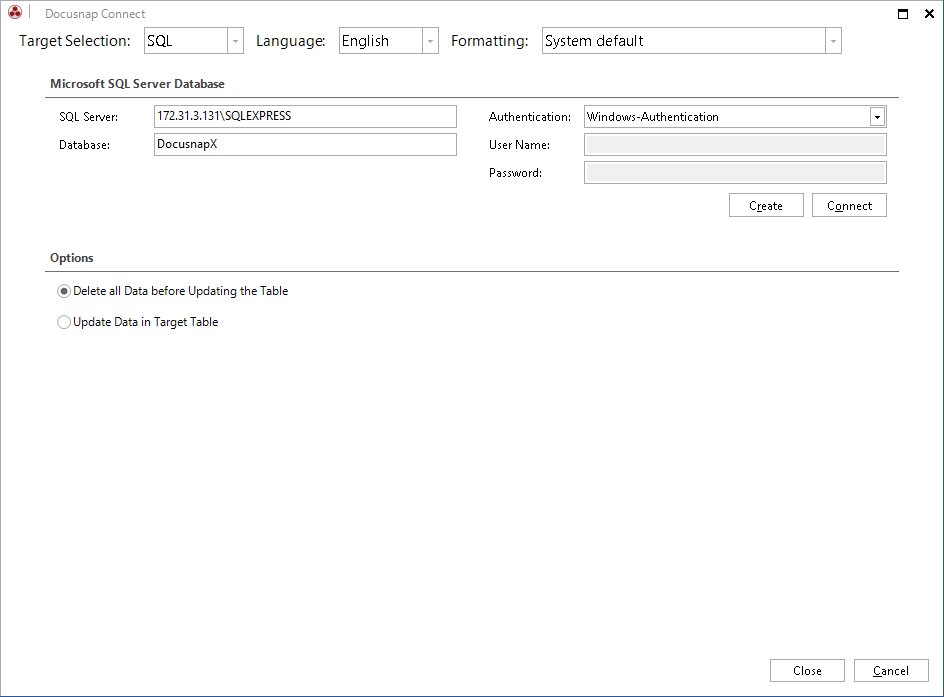
You can export the data to an SQL or MySQL database or save it as an XML, CSV or Excel file from within Docusnap. First, select the target in the Target Selection field. In the Language field, select the language in which you want the references to be written.
SQL
Before you can export the data to an SQL database, the connection to the SQL server and the desired database must be checked. If the specified database does not exist on the SQL server, it may be created. When exporting data to an SQL database, you can specify whether previously exported data should be updated or if you want to delete all data and populate the tables with the new export data.
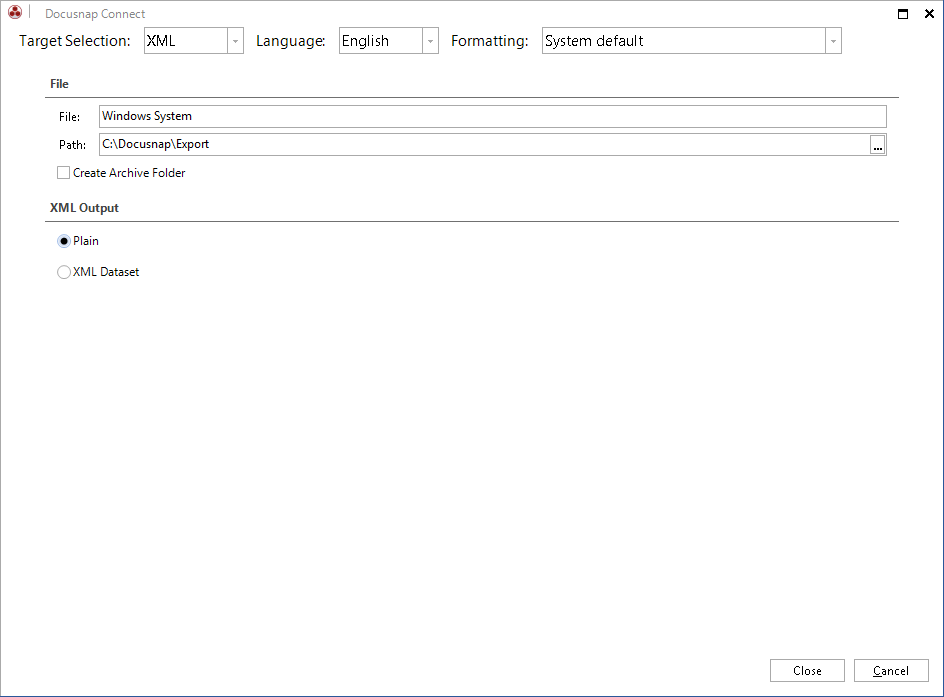
XML
When exporting data to an XLM file, you must specify its name and path. By enabling the Create Archive Folder checkbox, you can move older files to an archive folder. For the output, you can select a plain format or XML Dataset.
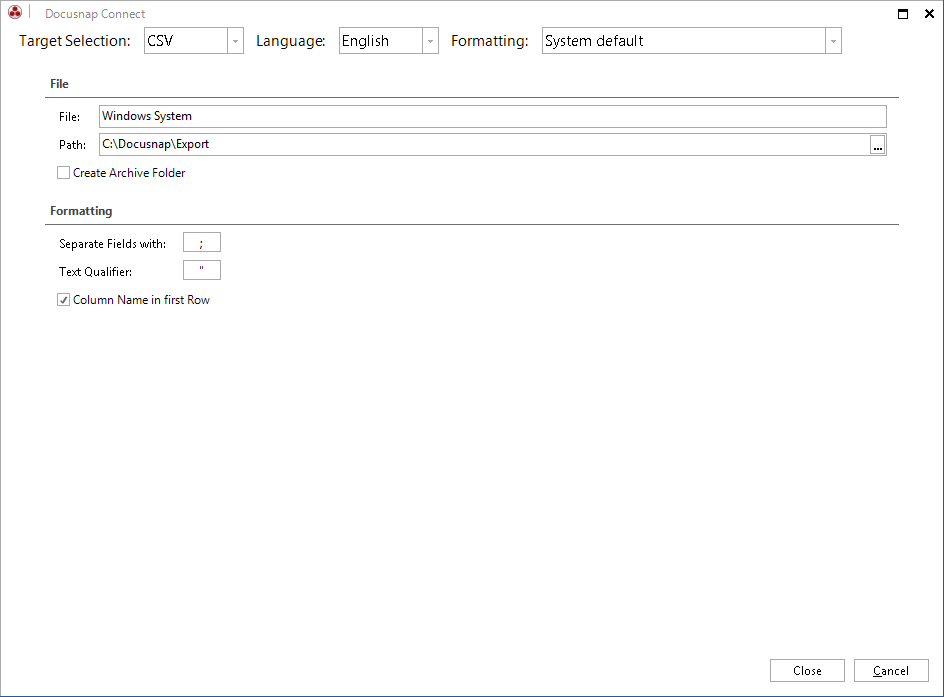
CSV
When exporting data to a CSV file, you must specify its name and path. In the Separate Fields with field, you can specify the field separator. The character you specify in the Text Qualifier field defines all text between two occurrences of this character as a unit. By ticking the Column Name in First Row checkbox, you can specify that the column names will be included in the output.
When you configure your package so that data will be exported to multiple tables, a separate CSV file will be created for each table.
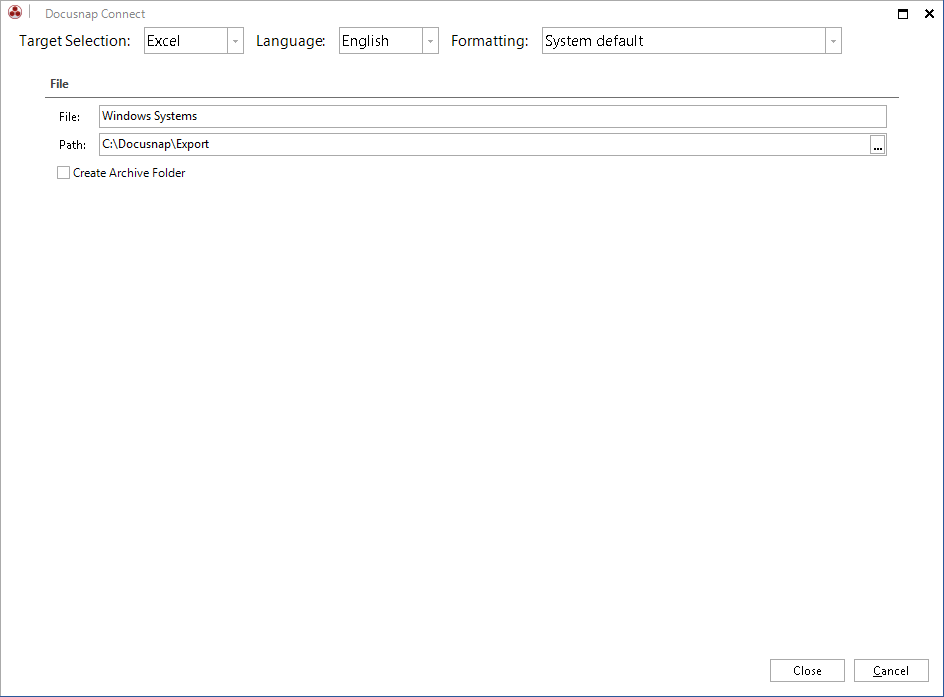
Excel
When exporting data to an Excel file, you must specify its name and path. By enabling the Create Archive Folder checkbox, you can move older files to an archive folder. If during configuration you decide to distribute the data output to multiple tables, a separate worksheet is created in the Excel file for each table.
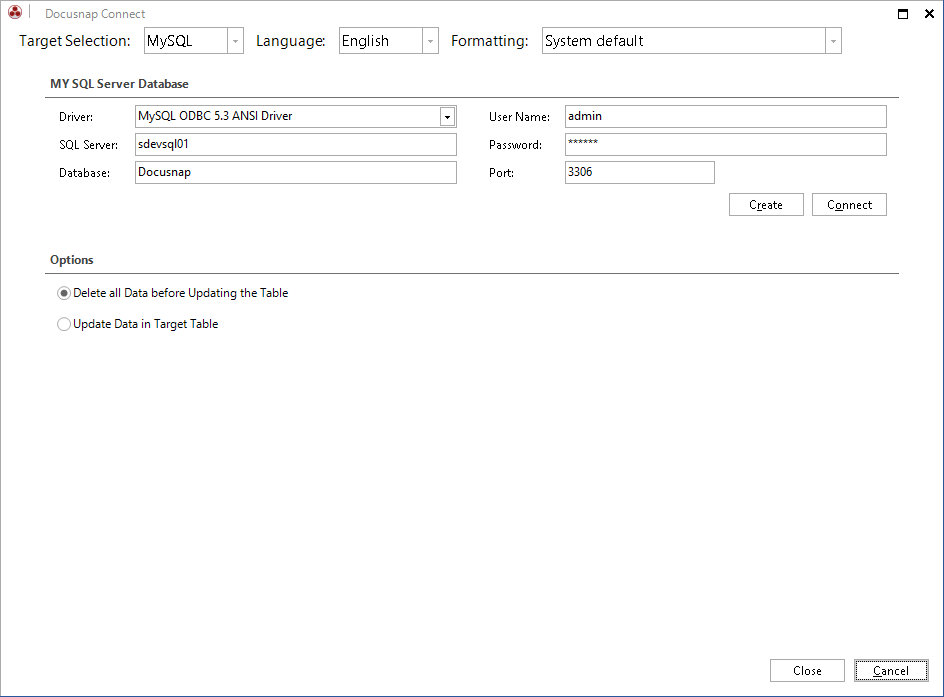
MySQL
Before you can export the data to a MySQL database, the connection to the MySQL server and the desired database must be checked. If the specified database does not exist on the MySQL server, you create it in this dialog. When exporting data to a MySQL database, you can specify if previously exported data should be updated or if you want to delete all data and populate the tables with the new export data.
The Driver drop-down list lists all installed MySQL ODBC drivers.
|
The MySQL ODBC driver is not supplied with Docusnap and must be installed manually. You can download the driver from the MySQL website. Follow the instructions and make sure you download and install the correct version. Docusnap requires the 64-bit version of the MySQL ODBC driver for a 64-bit operating system and the 32-bit version of the MySQL ODBC driver for a 32-bit operating system. There are some known problems with the 3.51 version of the 64-Bit ODBC Driver. Please install version 5.3 or higher. |

Summary
The Summary page shows all packages to be exported.
Scheduling
By using the Scheduling feature, you can specify that the automatic start of the data export starts at a later time.
In order to use this feature, the Docusnap Server component must be configured for this database on a system in the network.
Status
After the export has started, the dialog will display its progress. To abort the export process, click the Cancel button. All packages flagged as Completed have already been exported. They will not be deleted.
Final Report
The final report shows which packages could be exported successfully. To exit the wizard, click the Close button.
