
Click the Data Import (csv) button in the Data ribbon to open the data import wizard.
Import
In the first step, you can specify where to import the data. The following options are available: IT Assets, Extensions, and Table. Under IT Assets, all existing classes can be selected as the target. For the import to tables, you can select any available real tables. Under Extensions, you can select the Comments, Finances, Reminders, Contracts, or Passwords category. The import of passwords is only possible if an encryption file has been selected.

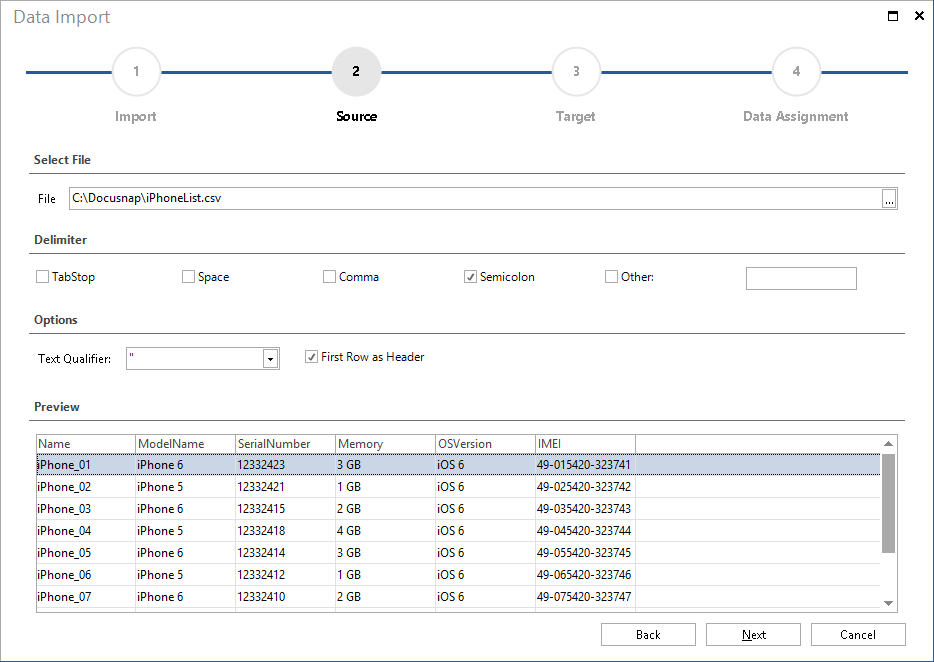
Source
Once you have selected the import type, specify the import file in the next step. The preview shows the first ten entries of the selected file. In the Delimiter group, you can specify the character used as separator for the data. The character specified in the Text Qualifier field defines all text between two occurrences of this character as a unit. Tick the First Row as Header checkbox to specify that the first row contains headers that should not be treated as data.
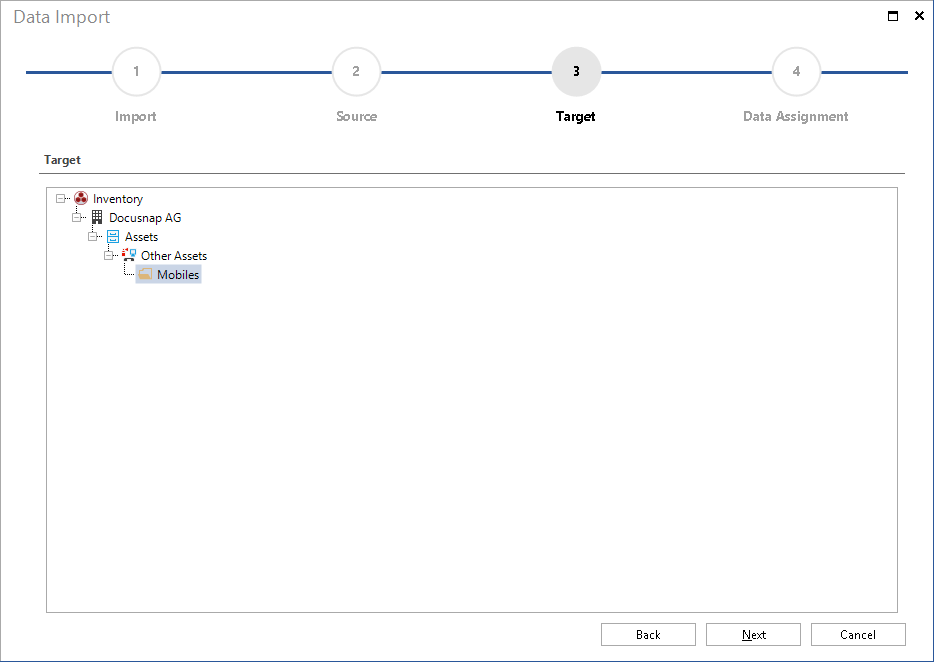
Target
The window for the Target step is only shown when you import IT assets or extensions.
- IT Assets: In the case of IT assets, select the folder for the IT assets to be imported.
- Extensions: Extensions are assigned to existing static objects. When importing extensions, specify the object to which the data should be associated. All static objects are available for selection.
Data Assignment
In the Data Assignment step, you can specify the columns to be used for storing the data to be imported. Mandatory fields, i.e. fields that must be filled in the database, are flagged by a yellow exclamation mark.
The CSV Values field lists the column headers from the CSV file. The Assign field shows all columns available in the selected table or all properties of the selected IT asset. To assign a field from the CSV Values field to a field listed in the Target Settings field, select the respective fields and click the Assign button to link them. To delete all assignments, click the Reset Assignment button.
When you click the Save Assignment button, an XML file which contains all specified assignments will be saved to the folder where the selected CSV file resides. If you later select the same CSV file, whose contents may have changed, again for import, load the assignments from this XML file by clicking the Load Assignment button. This way, you need not define the assignment again.
Columns filled with an auto-increment value will be hidden by default. To display them, enable the Ignore Auto-Increment checkbox.
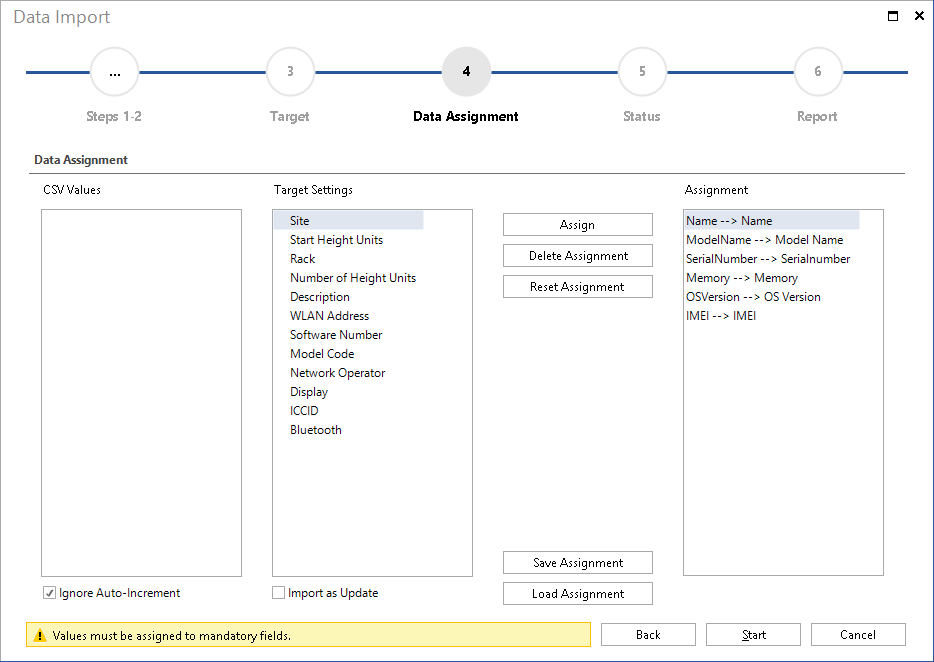
If you want to update previously imported data or compare new data with the previously imported data, enable the Import as Update checkbox. Then, you can specify settings related to the update in the Update step which displays next.
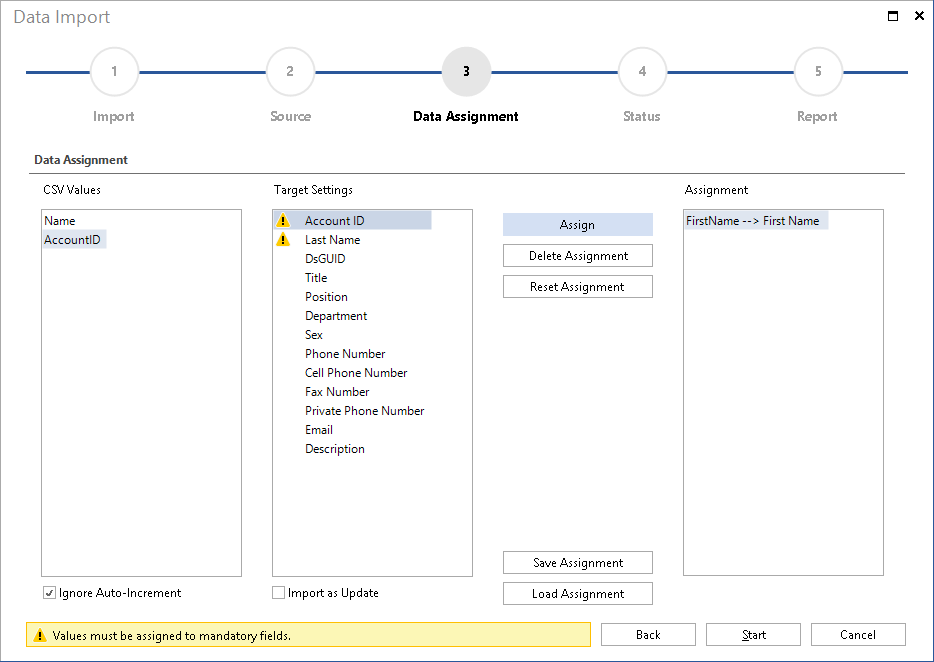
|
When importing data into tables, in most cases, the foreign key to the parent tables must be considered, otherwise the import will fail. For example, if the contact information is inserted into the tContacts table, the Account ID (tContacts.AccountID) must be specified so that the contacts in the tree can be displayed at the correct company. The columns named AccountID and DomainID are always the company or the domain to which the entry should belong after the import. In the Docusnap Management in the Manage Tables tab, the name of the foreign key column can be found. If the name of the columns is not sufficient to determine the parent table, you can use the Manage Objects tab to locate the object to which you want to import and then find the parent table. Subsequently, in the SQL Management Studio, a select statement can be executed on the parent table to obtain the foreign keys. For example, the AccountID can be found by using the statement select tAccounts.AccountID, tAccounts.AccountName from tAccounts. The AccountID of the desired company must be specified in the CSV file so it can be assigned during the import. After importing the data, they are then displayed at the correct company. As an alternative to the SQL Management Studio, you could also create a Connect Package containing the data of the table to obtain the correct foreign keys. |

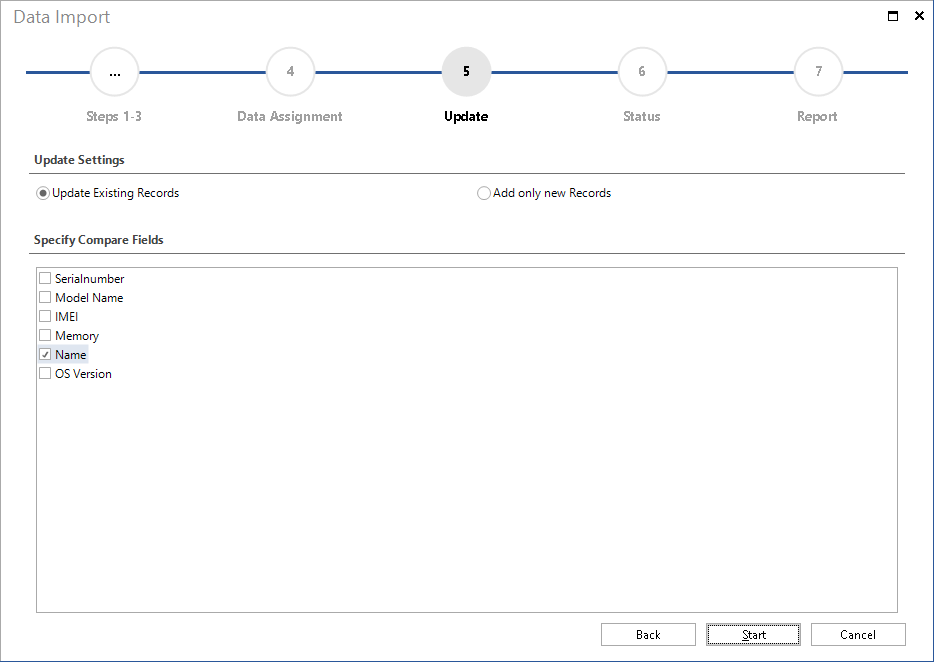
Update
Under Update Settings, you can choose to update existing records or only add new records. If you select Update existing records, new records will be added and records which have changed will be updated.
To enable the data comparison, you must select one or more values which are unique and therefore comparable, e.g. customer number, first name and/or last name. If a value occurs multiple times, none of the entries will be updated. These entries will be listed as skipped in the final report.
Status
The Status page displays information about the status and progress of the current import process.
Final Report
The final report lists the number of records imported successfully and specifies whether the import of any records failed.
