Filtering in Main Window
Click the Filter button on the Data tab to display the filter.
This filter can also be used for other lists, for example in some of the steps of a wizard.
Clicking the Enable Filter button displays text fields above the main window columns where you can specify the desired filters or enter keywords. The table displayed in the main pane of the wizard will be filtered by those keywords.
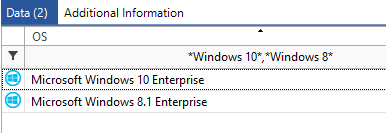
If you want to filter the data simultaneously by multiple filter criteria, these can be separated by a comma. For example Windows 10*, Windows 8.1*
In the case that a comma is included in the filter value, it must be marked with a \, otherwise the text before and the text after the comma will be considered as individual filter values.
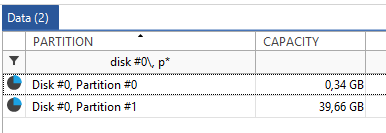
The asterisk (*) and the question mark (?) can be used as wildcards. Example: If you enter the keyword "Docu*", Docusnap will return all records that begin with "Docu" in the corresponding columns. The other way round: The keyword "*docu" will return all records that end with "docu".
The following additional filter options may also be used.
Filtering for Numbers and Dates |
Example |
>(greater than) or>=(greater than or equal to) |
Filters values greater than or equal to the specified value. |
>(less than) or.>=(less than or equal to) |
Filters values that are less than or equal to the specified value. |
<>(not equal) |
Explicitly excludes the specified value during filtering. |
When you have entered all required keywords, apply the filter either by clicking the Apply Filter button or by pressing the Enter key.
To display all data again without filtering it, either delete the keywords from the text fields and re-apply the filter, or remove the filter by clicking the Remove Filter button.
To export the current view, as displayed in the main window, to an Excel file, click the Export button. After you have saved the file, it will be opened directly in Excel.
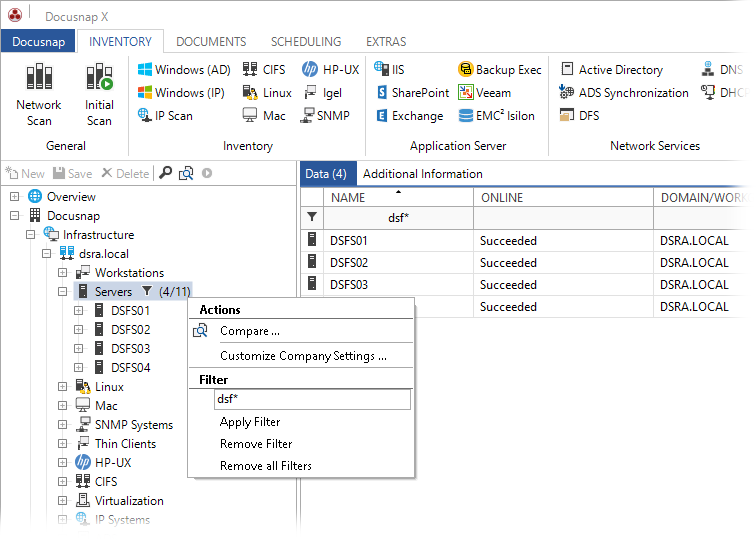
Filtering the Explorer
In addition to the filter specified in the main window, it is also possible to filter the nodes of the tree view. In the Inventory or Licenses tree view, right-click a node to display its context menu where you can specify the desired filter. This way, you can filter the data below the selected node. The filters will be stored on the computer where you are currently working. For this reason, the filters set in the tree view will also be retained when you restart Docusnap. The  icon indicates that a filter is currently applied to the node.
To specify a filter criterion, enter it in the text field below the "Filter" caption. As with the main window filter, both the "*" and "?" wildcards can be used as filter criteria. To enable the filter, either press the Enter key or click the Apply Filter option.
If a filter is applied to the tree view, the entries in the main window table will be filtered according to the same criteria. As soon as you remove the filter from the main window, Docusnap redisplays all data. This will, however, not remove the filter from the tree view. However, removing the filter from the tree view will also remove the filter from the main window.
To remove the filter for the current node, click the Delete Filter option from the context menu. To remove the filters for all companies in all tree views, click the Remove all Filters option.