
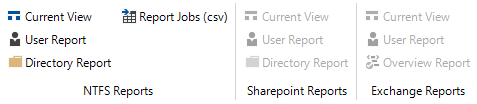
In the Permission Analysis module several different reports can be generated. One report shows the effective permissions for specific users to one or more directories. All users who have a permission to a specific directory will be shown in the second report. The third report, Current View, includes the permissions that are currently displayed on the Permission Analysis tab.
In addition, it is possible to create a report for Exchange which lists the permissions of selected users or groups to the mailboxes, mailbox folders, or public folders. The Exchange Overview report lists all users who have permissions to the mailboxes, mailbox folders, and public folders.
Click the button User Report, Directory Report or Overview Report to open the wizard to generate the reports.
To create the user reports at least one user or group has to be selected in the User Selection before opening the wizard.
The selected node will be used as the starting point.
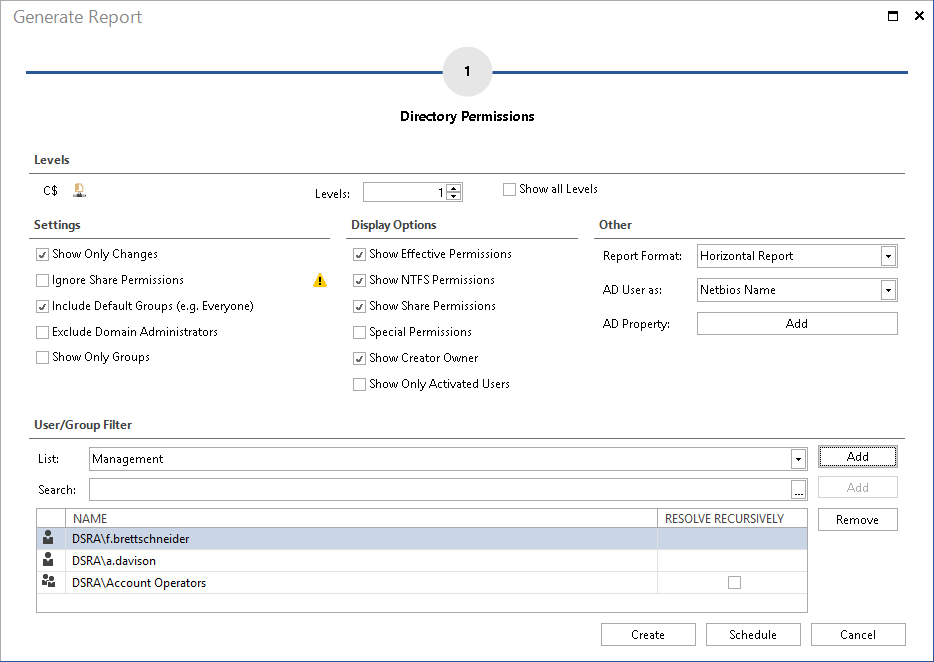
Levels
A hierarchical tree structure displays the entries for the file system, the SharePoint environment, and the Exchange servers. You can specify the number of sub-levels to be included in the report by setting the Levels field to the desired value. To include all levels, tick the Show All Levels checkbox.
Settings
If you enable the Show Only Changes checkbox, only those entries will be displayed where the effective permissions of the selected users or groups have changed. If this checkbox is not enabled, all directories, SharePoint entries, Exchange mailboxes, etc. and the corresponding user and group permissions to these items will be shown.
When calculating the effective permissions the share and NTFS permissions are used, taking into account the inheritance of permissions. By selecting the checkbox Ignore Share Permissions, only the NTFS permissions are analyzed.
|
By enabling the Show Only Changes option, you can significantly reduce the resulting number of report pages and thereby improve the readability of the report |

For directory reports additional settings can be determined.
If you check the Include Default Groups (e.g. Everyone) option, the users of default groups will also be included. Since domain administrators have full access to all directories in most cases, you can exclude them from the reports by enabling the Exclude Domain Administrators checkbox. If the Show Only Groups checkbox has been enabled, only the permissions for groups, and not those for individual users, will be included.
Display Options
Usually, the report will show three blocks of permissions (effective, share and NTFS). Using the respective checkboxes you can hide or unhide information.
If the Special Permissions checkbox is enabled, the Special Permissions will be shown. Otherwise, the report will only show the Basic Permissions.
The Show Creator Owner checkbox can be used to specify whether users who have been granted permissions to the folder based on the Creator Owner group should be included in the report.
If the Show Only Activated Users checkbox is selected, only active users are displayed in the report. Even if disabled users have directory privileges, they are not listed in the report.
Other
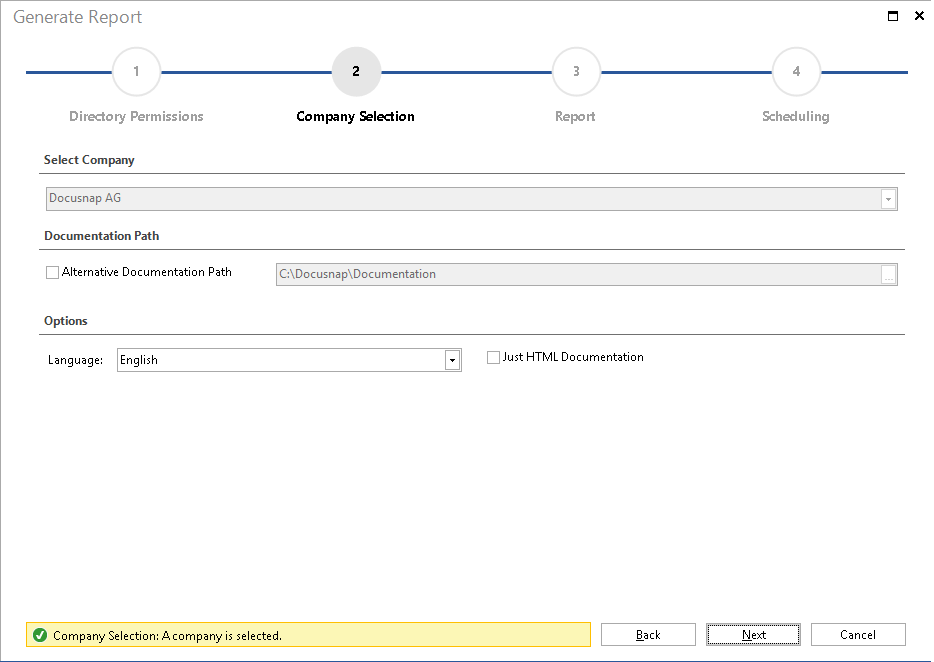
For the user, directory and overview reports three different output formats are provided.
- Horizontal report:
The horizontal report lists directories, users/groups and permissions one underneath the other. - Vertical report:
The vertical report displays the directories, users/groups and permissions in a matrix. - Excel:
When in the wizard the output format Excel is selected, the data is exported directly into an excel file. The file is saved in the documentation path below the respective domain.
(\Documentation Path\Company\Domain\Starting Point\Reports\PermissionsDirectory) or
(\Documentation Path\Company\Domain\Starting Point\Reports\EffectivePermission)
The report displays the Netbios name of the users and groups by default. In the AD User as combobox, you can define whether the Display Name, Netbios Name, the Name, or User Principal Name is used in the report.
You can use the Add AD Property option to specify AD properties, that are then displayed for the users and groups in the report.
User/Group Filter
With the User/Group Filter users or groups can be excluded from the directory report. This can be useful, for example, so users and groups, that are not of interest, or who have access to all directories, are not listed in the reports. In the List combo box defined lists of users and groups can be added. These are compiled in User/Group Filter dialog. Click the Add button to add the users and groups of the selected list. Via the Search text box, users and groups can be added individually. Once the first letter is entered, the matching entries are suggested. Users and groups can be added via click on the Add button. Click the  button in the Search text box to open the Advanced Search dialog. The selection of users and groups in the advanced search works the same way as when you add the user for the analysis of the effective permissions. For groups you can select via the Resolve Recursively checkbox, if only direct users of this group should not be considered or if the users of the subordinate groups will also not be listed in the reports. Click the Remove button to delete a currently selected entry.
The report may be exported to various file formats. Click the Export button on the Reporting ribbon and select the desired format. Clicking the desired format opens a dialog where you can select the pages to be exported. Click the + sign to expand the Settings group. Then, you can select format-specific settings. If the file should automatically be opened after the save, enable the Open After Export checkbox.
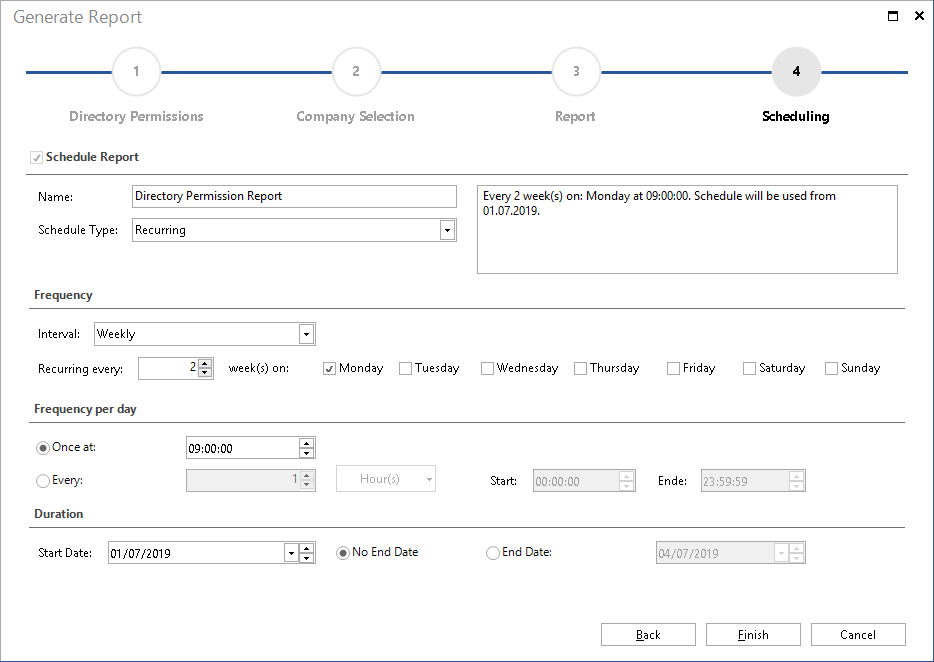
Scheduling
With Docusnap, you can schedule the creation of reports and have them generated automatically at a later point in time.
Click the Schedule button to open the next step. In case you do not want to create the report using the predefined directory (documentation path), specify an alternative path. By default, the documentation path defined for the Docusnap Server will be used. If you specify an alternative documentation path, that path will be used. In addition the language can be chosen.
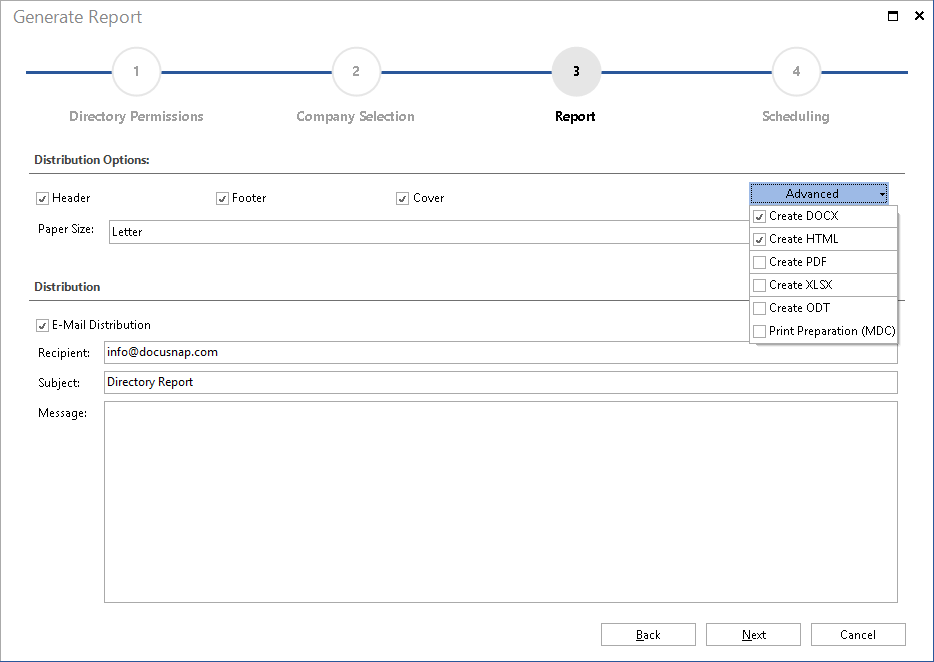
In the next step, you can select the desired report format. The following formats are available: docx, xlsx, html, odt and pdf.
Additionally, you can specify here whether to include a cover page, a header and a footer in your report. If you do not make any changes, the settings from the Layout (CI) dialog will be used.
If you tick the E-Mail Distribution checkbox, the report will be sent to the e-mail address(es) specified below. Even if E-Mail Distribution is enabled, the reports will always be saved to the specified documentation path.
In the last step, you can define scheduling details. This step determines when and how often the report will be created. Click the Finish button to save the task.
|
Scheduling will only work if the Docusnap Server service has been set up. |

Report Jobs
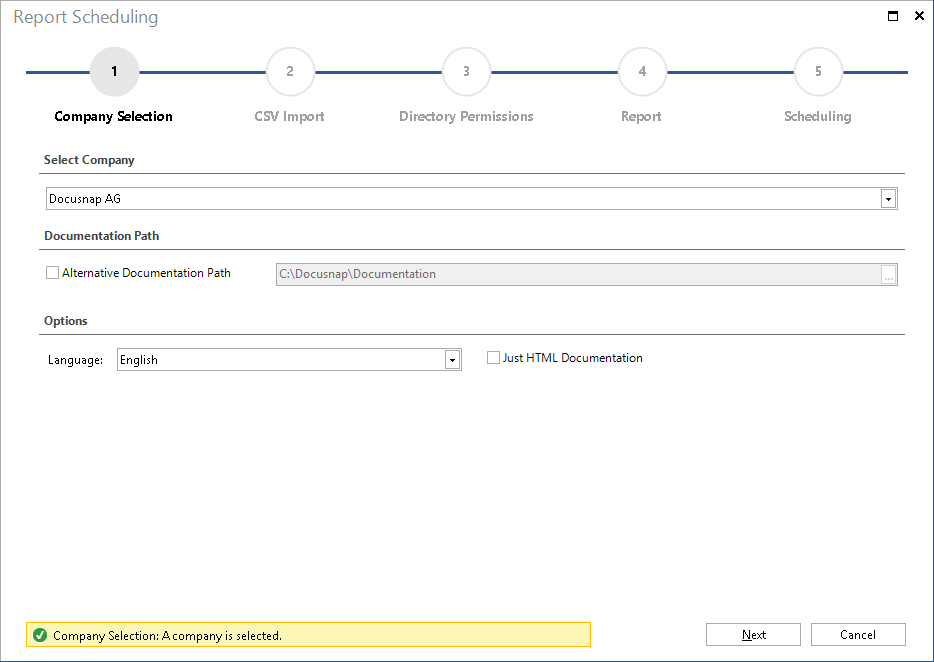
Additionally it is possible to schedule the Directory Report for several shares simultaneously and send it to a defined e-mail address. Thereby a CSV file is imported where the desired shares are listed. Click the Report Jobs (csv) button to open the wizard. Select the company in which the shares are located. In addition, an alternative documentation path and the language can be selected.
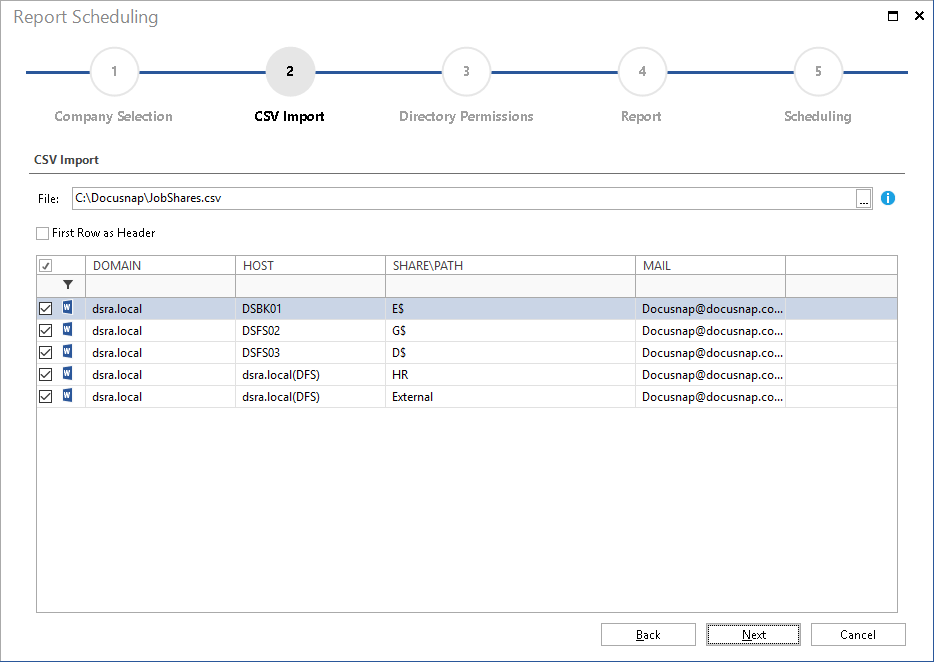
In the next step, the CSV file is imported. In the CSV file the values for Domain, Host, Share and E-Mail must be listed in that order separated by ";". If the desired shares are in a DFS structure, you must additionally write (DFS) behind the host so that the respective shares can be found.
For example:
dsra.local;DSBK01;E$;Docusnap@docusnap.intern
dsra.local;DSFS02;G$;Docusnap@docusnap.intern
dsra.local;DSFS03;D$;Docusnap@docusnap.intern
dsra.local;dsra.local(DFS);HR;Docusnap@docusnap.intern
dsra.local;dsra.local(DFS);External;Docusnap@docusnap.intern
For each entry is checked whether the share was inventoried for the specified host in the specified domain. The report can only be scheduled, if the directories and permissions for the specified share are available. When executing the job the report will be sent to the specified email address. If no email address is specified, the report will only be saved in the specified documentation path. Check the respective checkbox to select the shares for which a task should be created. The CSV file can be created and edited using Excel or a text editor.
Click the Next button to switch to the Directory Permissions step. In this step, the options for generating the report are selected which have already been described in this chapter. After the format of the report and the subject for the email are defined in the Reporting step, you can define in the step Scheduling when the jobs should be executed. Click the Finish button to create a job for every selected share, which will be executed at the scheduled time.
