
The Docusnap Azure Inventory dialog prompts you for multiple IDs. These IDs are assigned during the preparation in Azure. The values can be saved in a text editor to have them at hand when you are prompted to enter them in the Azure Inventory Wizard .
Overview
Required Permission
Before you start, make sure that you can log on as an Azure user who has global administrator rights.
Creating the New Application
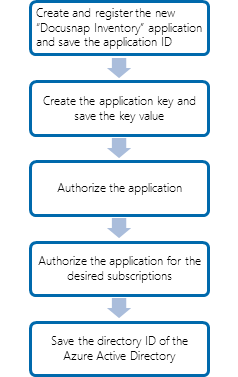
For the Docusnap Azure Inventory feature, a registered application is required. This application must have read access to the Microsoft Azure data. This section describes how to create such an application. In our example, the application is called “Docusnap Inventory”. You can choose any name you like, but it is recommended to enter a meaningful name.
To grant the Docusnap Azure Inventory feature read access to the Windows Azure Service Management API, you need to create a new application of the Web App / API type.
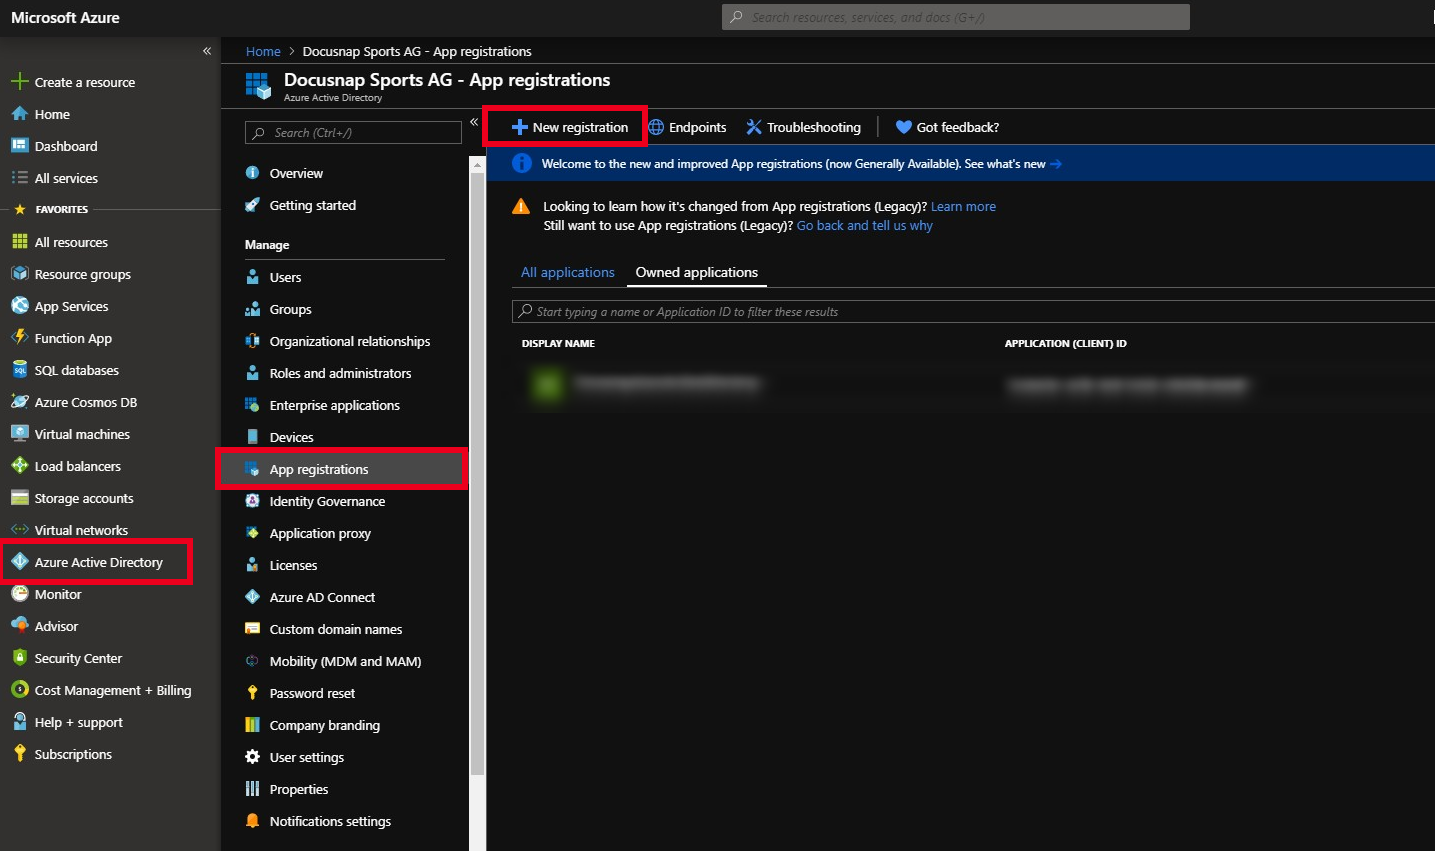
Opening the New application registration dialog
- Select the Azure Active Directory item from the resource list or search
- In the Azure Active Directory view, select the App Registrations item under Manage
- Choose New Registration
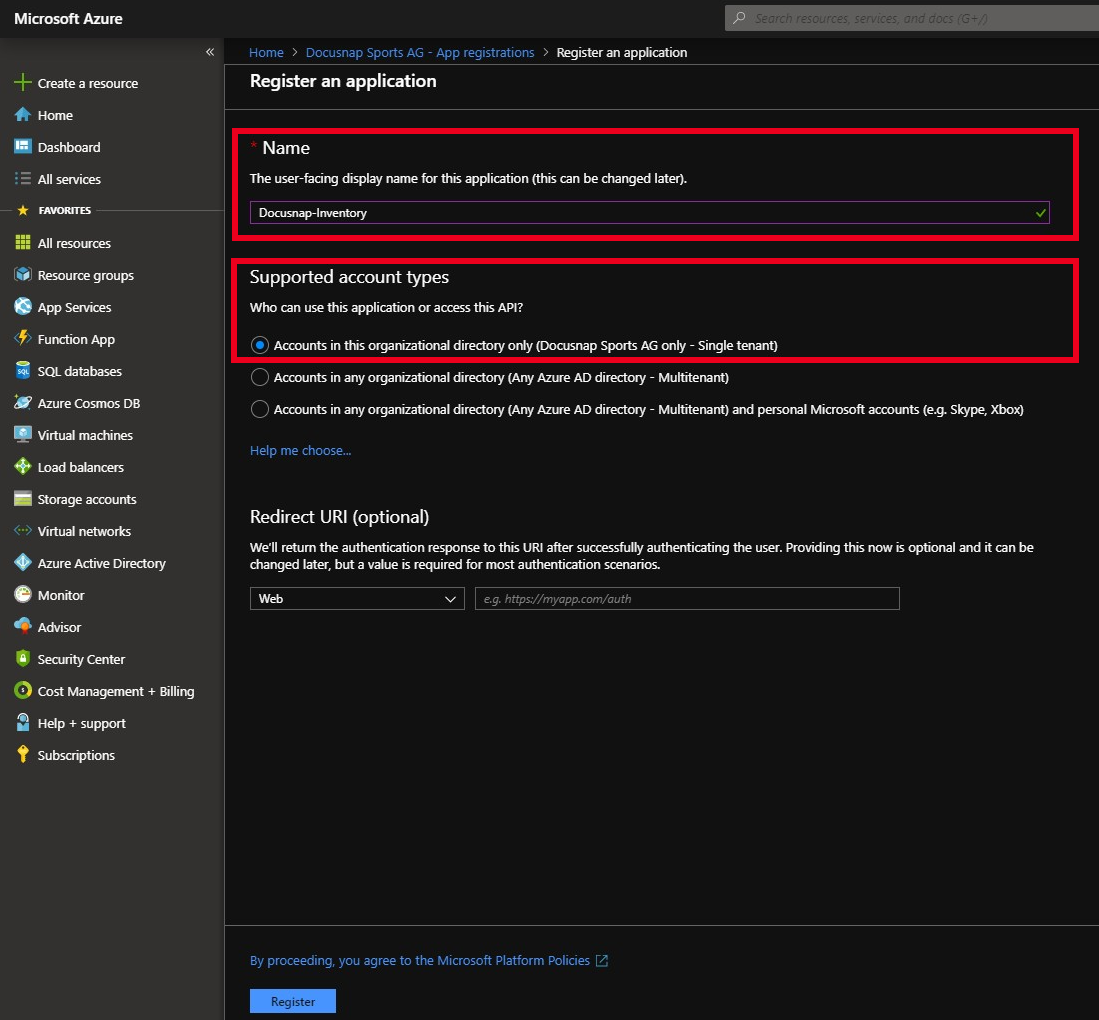
Register the application
The following information is required to register the application:
- Name: Enter the application name Docusnap-Inventory.
- Supported account types: Here you can select who can use the application - select Accounts in this organizational directory only.
Determine Application and Directory ID
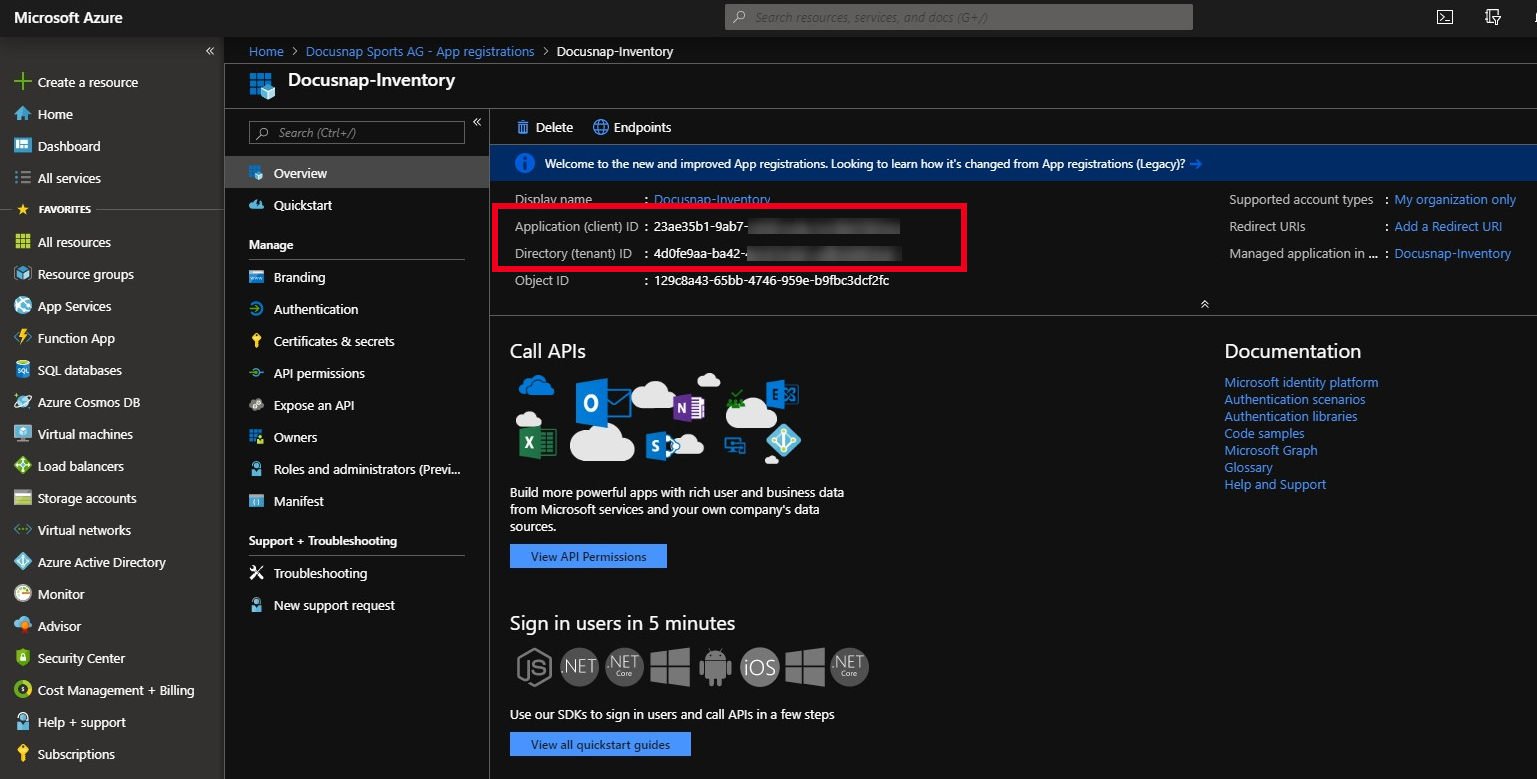
After the creation is completed, the overview dialog of the application is displayed. Now copy the application and directory ID and write it down for the Docusnap scan dialog.
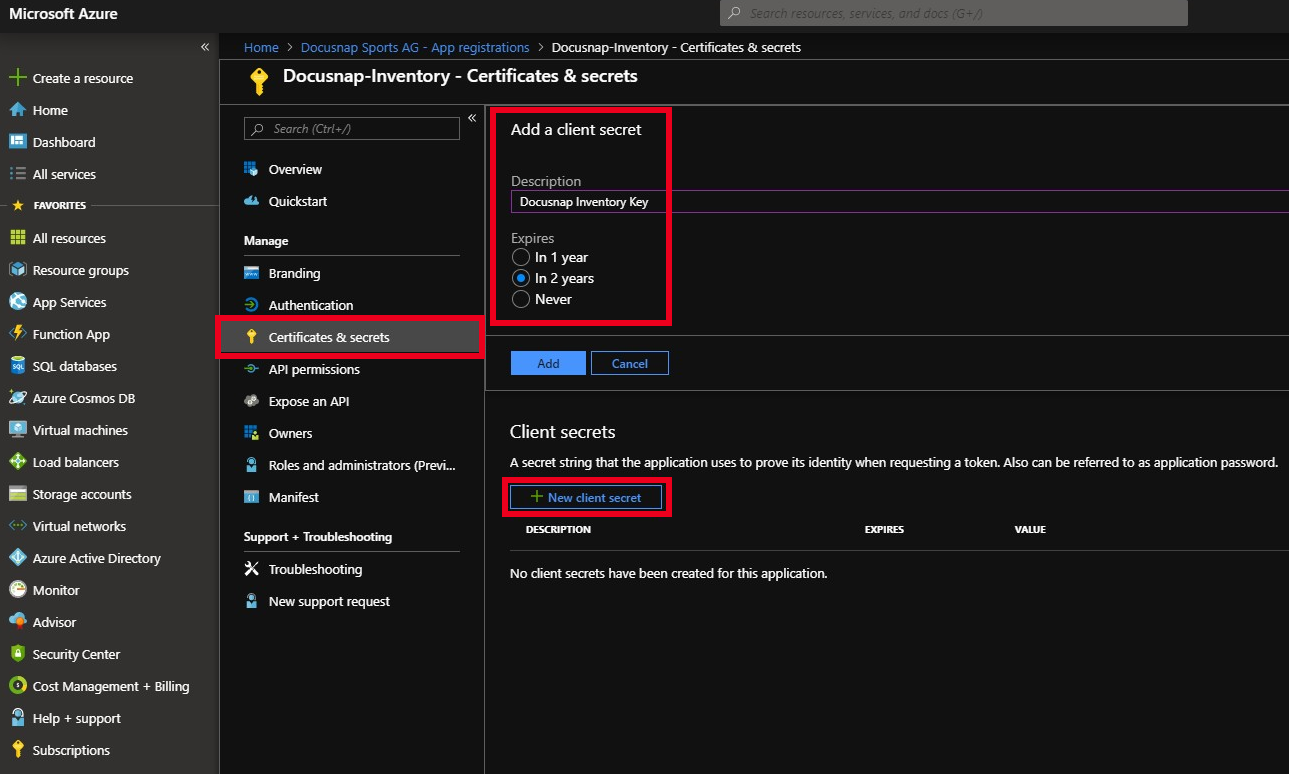
Create a client secret
Now create a client secret. In the Manage area, select the item Certificates & secrets
- New client secret
- Enter a Description and
- the validity of the secret
Note: The key can only be viewed directly after creation. If the key is lost or becomes invalid, a new key must be created.
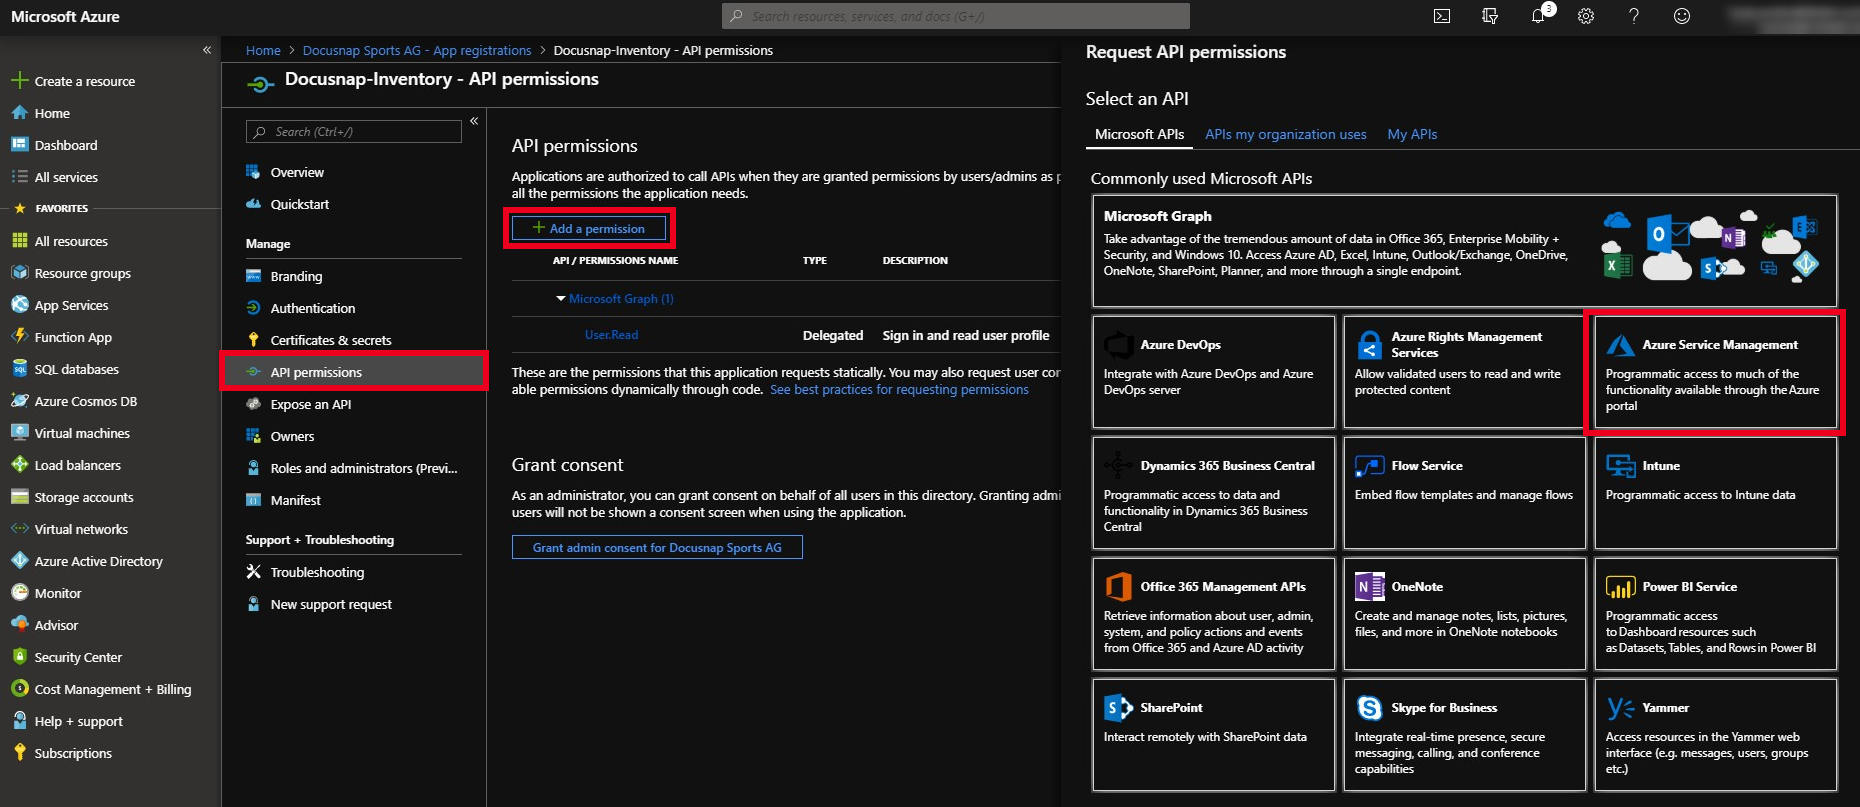
Authorizing the application – API permissions
Now the application must be authorized for the Windows Azure Service Management API.
- In the Manage pane, select API Permissions
- Add a permission
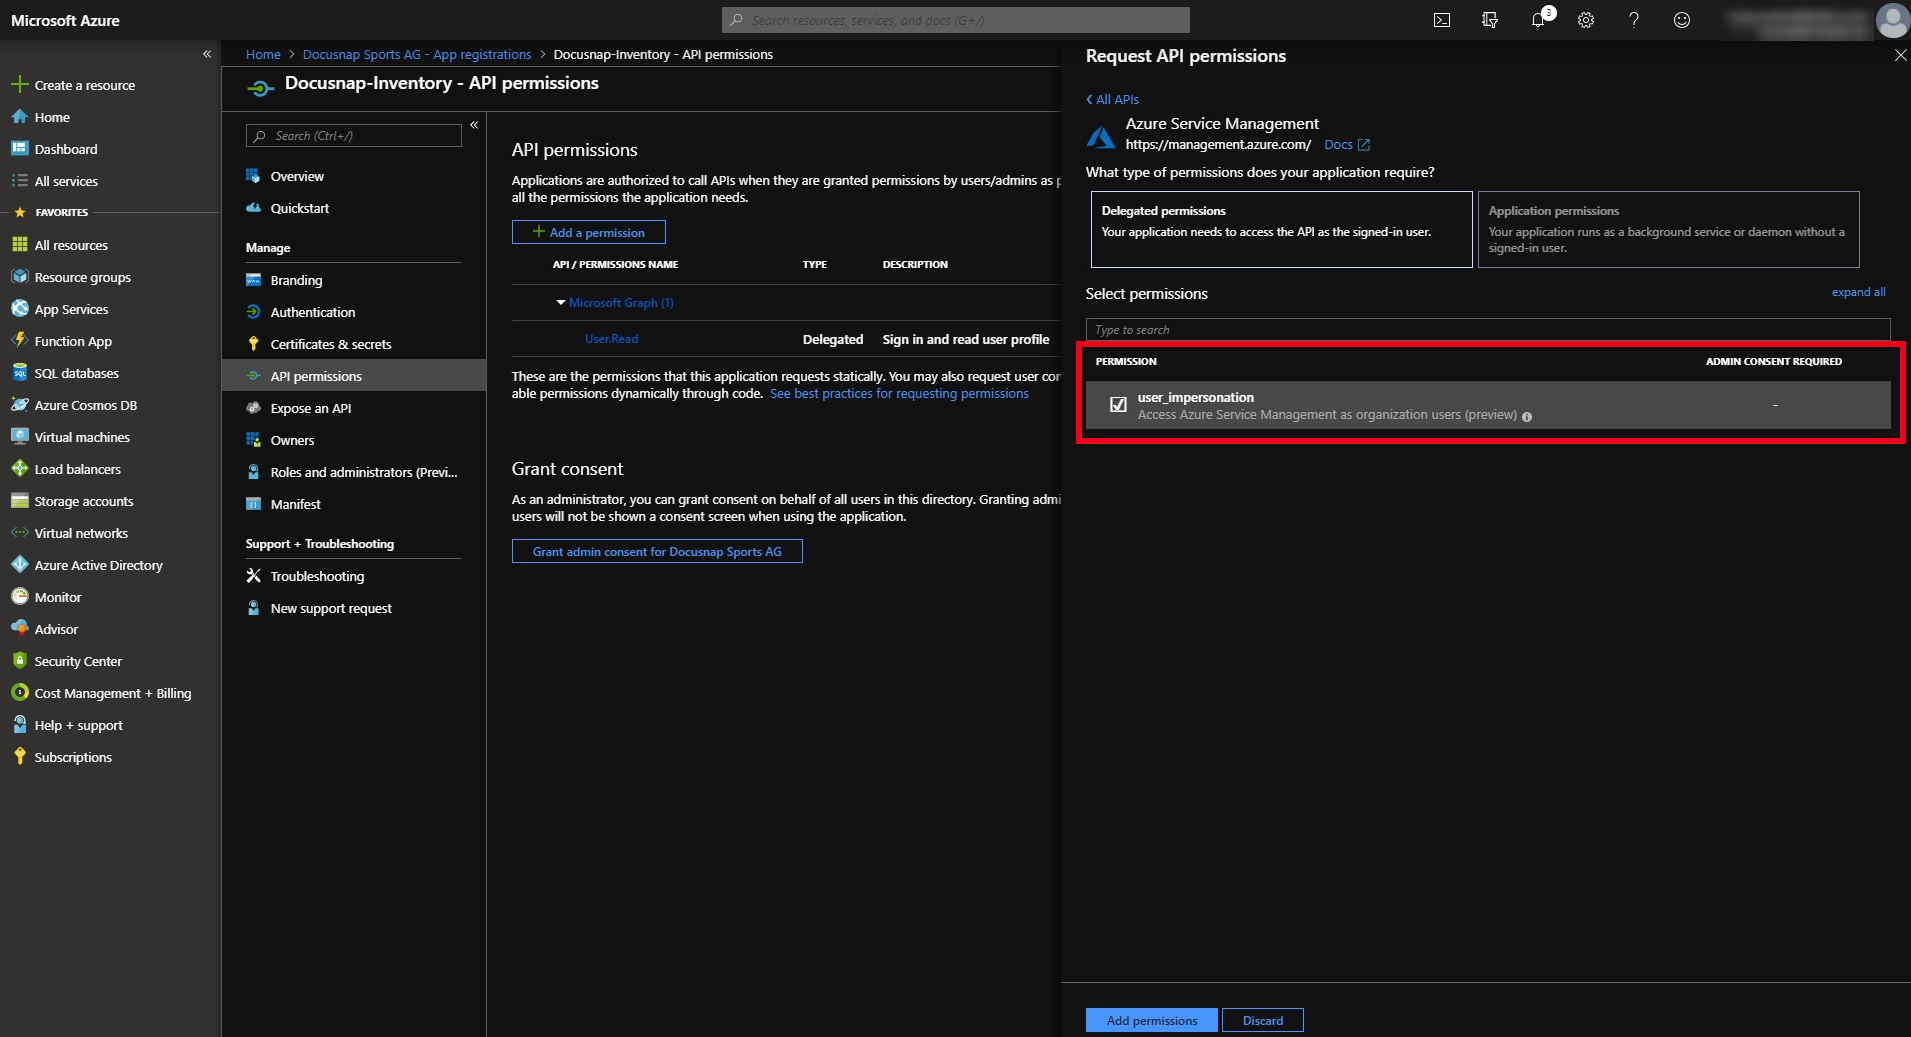
- Azure Service Management
- Now select the authorization user_impersonation (Access Azure Service Management as organization users) and add this authorization.
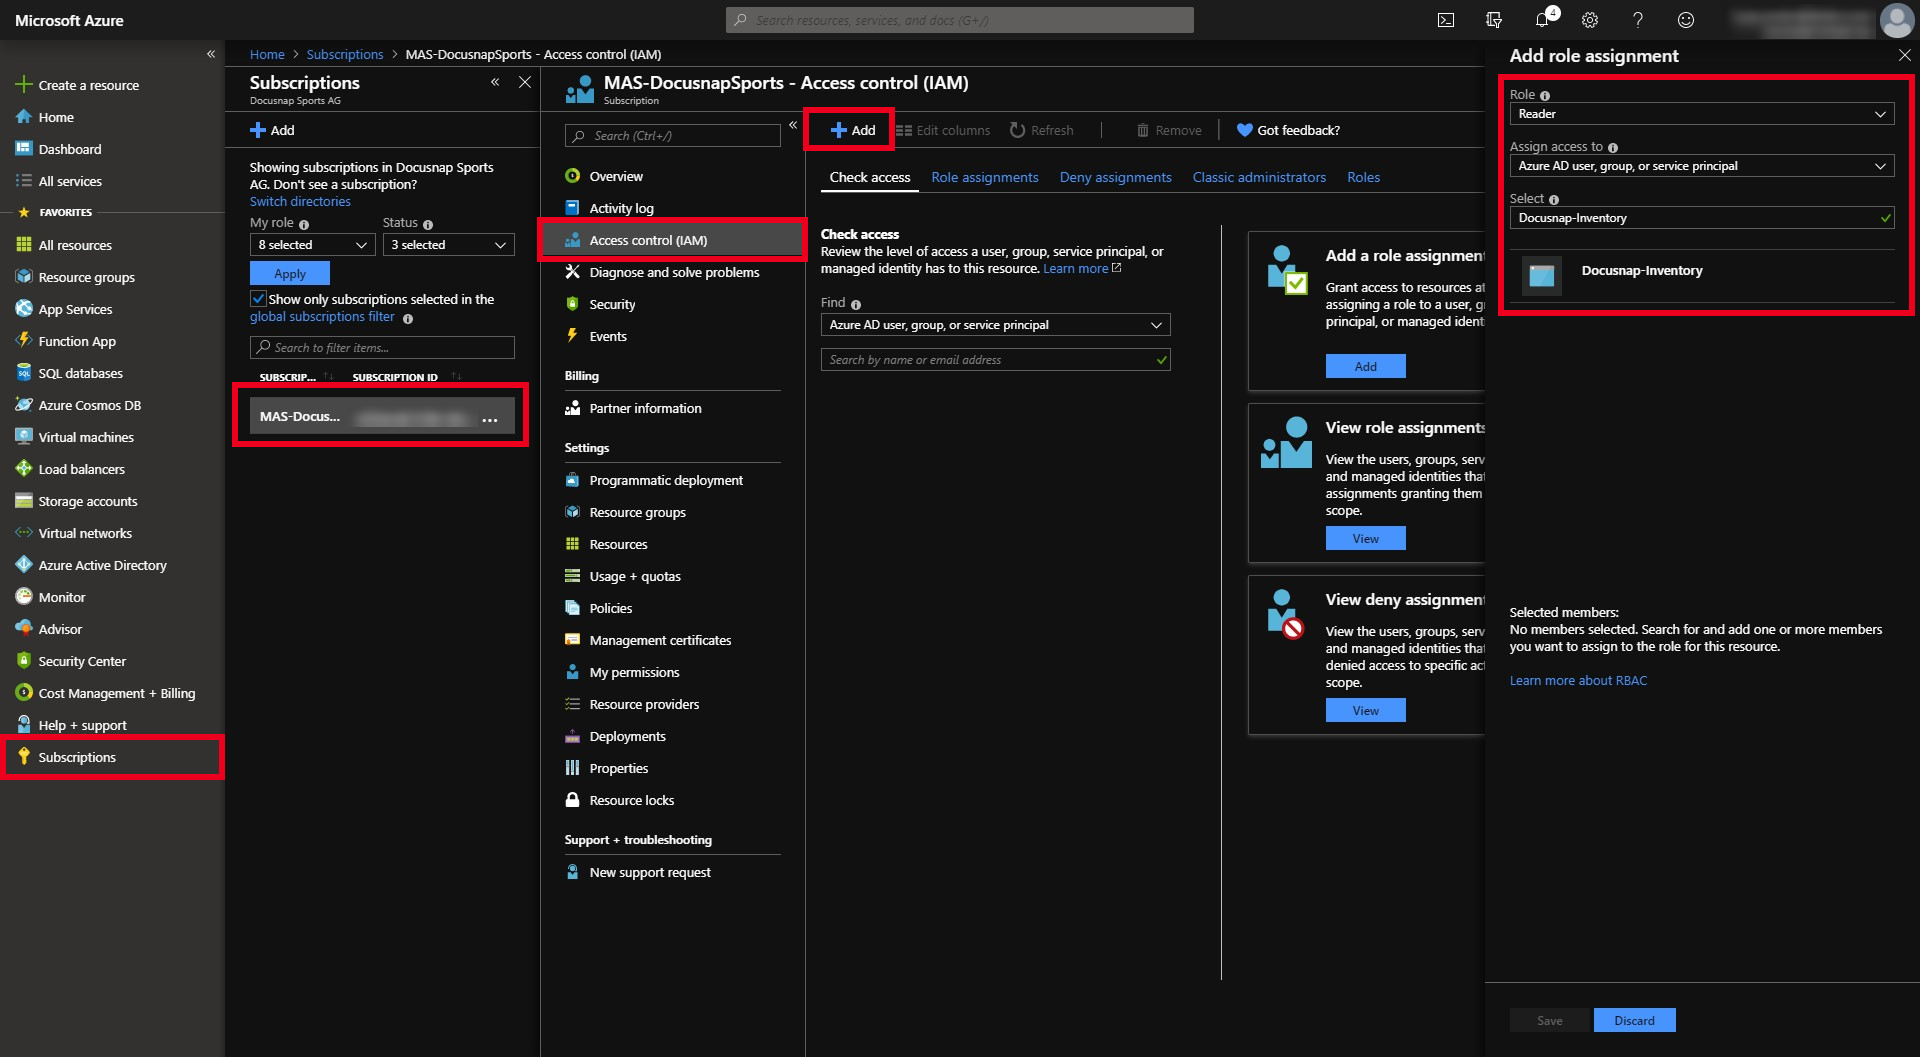
Authorizing the application for all desired subscriptions
Now the application is granted read access to the required subscriptions in Azure.
- From the resource overview or search, select Subscriptions
- Select the desired subscription
- In the subscription selection, choose Access Control (IAM)
- Add – Add Role Assignment
- In the role selection, select the Reader role.
- In the Select field, enter the name of your application
- Select your application. It will now be listed under Selected Members
- Confirm the assignment with a click on Save
Note: The steps listed must be repeated for each subscription you wish to inventory with Docusnap.
For a successful inventory, the following endpoints must be reachable:
- https://login.microsoftonline.com
- https://management.azure.com/
