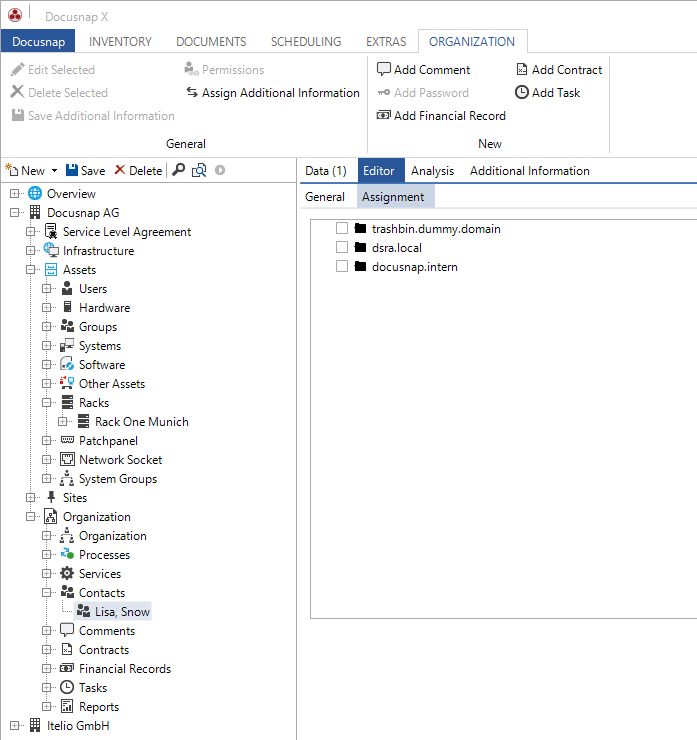
Using the TreeView element, you can assign elements from another table to the current element using a tree structure. It is easy to assign an element from the table to be connected to the current element by enabling its checkbox. The advantage of the TreeView element is that you can assign multiple elements. This is helpful if the assignment via a combo box, which only allows a single connection, is not sufficient. To create a TreeView control, specify the following properties:
Specific Properties of a TreeView Control |
|
MappingForeignKeyField |
Here, you can specify the foreign key field of the table to be used to define the relation to the table to be linked. |
MappingReferenceField |
Here, you can specify the field in the related table where the selected data from the reference table will be saved. |
MappingTable |
Here, you can specify the name of the table that relates both fields to be linked. |
ReferencePrimaryField |
Here, you can specify the primary key of the reference table. |
ReferenceRecursionField |
Here, you can specify an existing recursive field if the reference table is recursive. |
ReferenceSQL |
Here, you can specify the SQL statement used to query the required data from the reference table. |
ReferenceTextField |
Here, you can specify the text field to be used as a node name in the tree. |
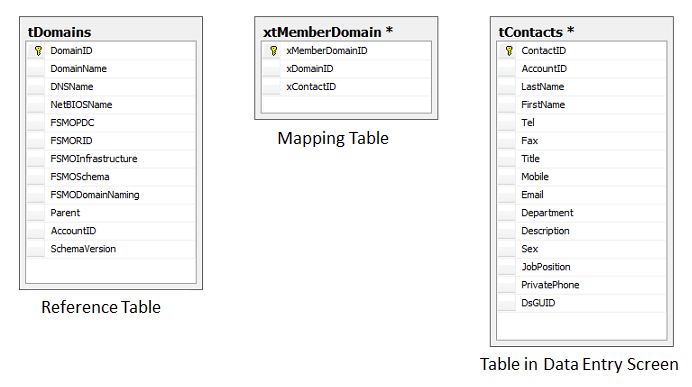
Example of use:
Assume you want to use the TreeView control to assign each contact the domain to which it belongs.
First, create a table that relates the contacts and the domains tables to each other. For this purpose, follow the instructions given in the Extending the Database Structure section.
The xtMemberDomain table, which includes the xDomainID, xContactID and xMemberDomainID fields, has the following structure:
Now, all data can be specified on the Properties tab of the TreeView control.
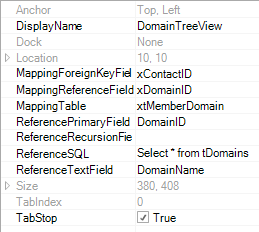
For the ReferenceSQL property, enter a simple SELECT statement on the tDomains table. To obtain all domains of the current company, use the {AccountID} variable. The variable will be filled with the company AccountID for which you create this data entry screen.
After you have entered all required data, you can save the element for later use.