
In Docusnap, an integrated Designer is available that you can use to customize or create data entry screens.
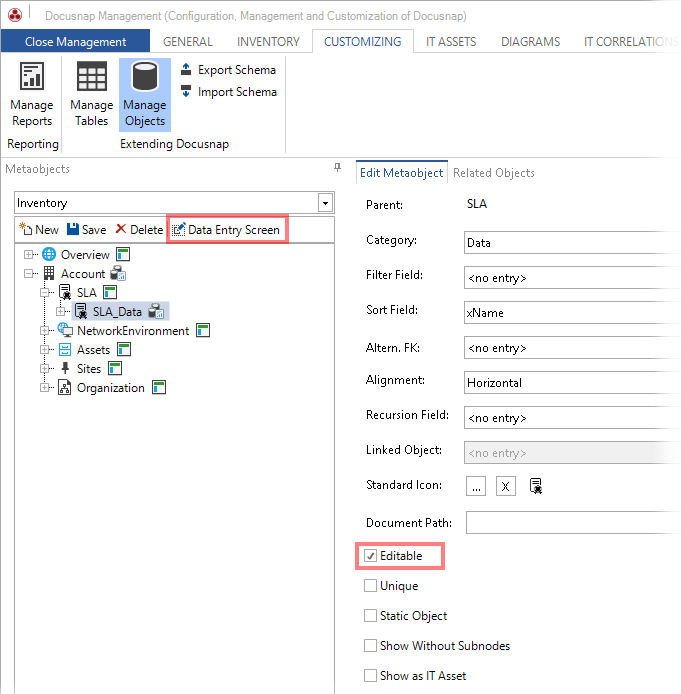
The data entry screens are created directly with the respective meta objects in the Docusnap Management. Click the Manage Objects button on the Customizing ribbon to open the Meta Objects ribbon. After the object has been selected, for which the data entry screen should be edited or created, click the Data Entry Screen button to open the tab for editing. Only when the Editable checkbox is checked can a data entry screen be created.
Each data entry screen belongs to exactly one meta object, the name of the meta object is used for the file name. Therefore each data entry screen of the company nodes must also be adapted individually for the explorer in which it is needed. Changes to the data entry screen of the company in the inventory, for example, are not transferred to the data entry screen of the company in the license management.
|
The data entry screens of the extensions can be opened and modified using the Inventory tree view by clicking on the Data Entry Screen button of the respective meta object for comments, finance, contracts, reminders or passwords on the Metaobjects tab. The metaobjects can be found below the Organization caption. |

Basic Structure of the Designer
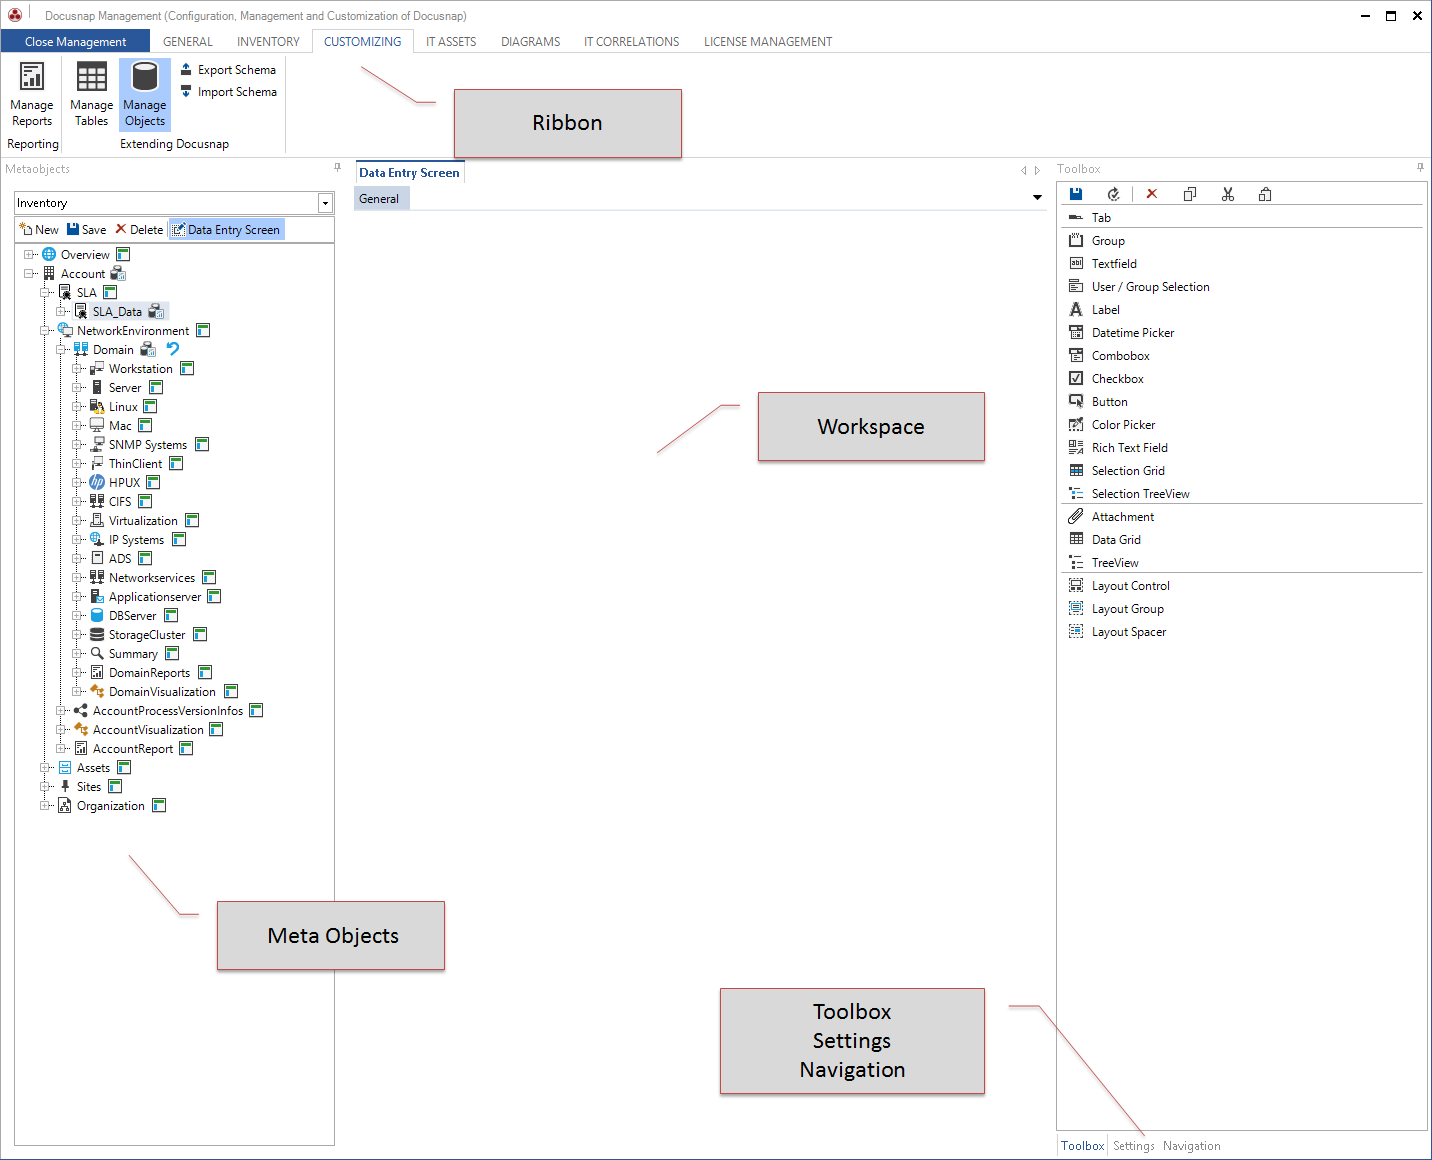
Basically, the Designer for editing data entry screens consists of four panes: the Workspace, the Toolbox, the Properties and the Navigation tab. The Workspace is the largest of these areas. Above the workspace, the so-called "tabs" are located. They extend the available space and help to organize the data entry screens in a meaningful way. They will be explained in more detail in the Using Tabs section. In the right pane, either the Toolbox, the Properties or the Navigation tab is displayed. To save the edits made to a data entry screen, click the Save button in the Toolbox. Similarly, you can reset a data entry screen to its original settings by clicking the Reset button.
Adding and Configuring Controls
To add a new control, simply drag it from the Toolbox and drop it on the Workspace. In the Toolbox, various controls are available that can be used in different situations. For details regarding the functionality and properties of the each control, see the Controls section.
It is recommended to add a Layout Control in the first step. The other controls such as textboxes, comboboxes, etc. are then added to this Layout Control which will control the size and alignment of the elements automatically.
There are two ways to remove an existing control from a data entry screen. After the control has been selected (is highlighted by a red border), you can delete it by either clicking the Delete Control button in the Toolbox or by pressing the <Del> key on the keyboard.
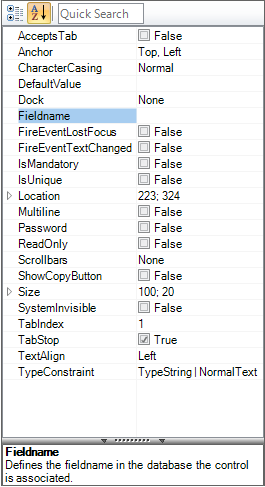
To move a previously added control, simply select it and drag it to the desired position with the mouse. Properties for the controls can be changed in the Properties tab. Please note that the properties of system-defined controls may differ from those of controls added by a user. Similarly, predefined controls cannot be deleted. To modify the properties of a control by means of the Properties tab, the desired value can, in most cases, be entered directly into the right column of the displayed table. In some special cases, it is possible to make changes to the settings from a separate dialog. If so, the button All controls that are placed on a data entry screen will automatically be linked with the current record for the associated meta object and can be used to edit this data. |
 is displayed in the right column of the
 Toolbox
You can use the icons ![]() in the Toolbox to copy, cut and paste controls. It is also possible to copy a control from one tab to another or to a different data entry screen. By pressing the Ctrl key, multiple controls can be selected and copied at the same time. In addition to the icons, the keyboard shortcuts Ctrl + C, Ctrl + X and Ctrl + V can be used for copying, cutting and pasting. Only custom controls can be copied.
in the Toolbox to copy, cut and paste controls. It is also possible to copy a control from one tab to another or to a different data entry screen. By pressing the Ctrl key, multiple controls can be selected and copied at the same time. In addition to the icons, the keyboard shortcuts Ctrl + C, Ctrl + X and Ctrl + V can be used for copying, cutting and pasting. Only custom controls can be copied.
Navigation
In the Navigation pane, all elements of the data entry screen are listed. If a Display Name has been defined for an item, this name is specified otherwise the type of control. In this structure, the element can be selected and then the settings can be changed in the Properties pane.
